23 Budget Binder Ideas for Beginners Who Want a Fresh Start
Last updated on May 5th, 2026 at 03:43 pm
You've tried budgeting apps that ping you with notifications, only to ignore them after a week. Maybe you've scribbled numbers on scrap paper that ended up lost in a drawer. A budget binder changes that—it's a physical, customizable tool that puts you in charge.
Think of it as your money command center. No complicated software, no learning curve. Just you, a binder, and a system that actually works for your life.
These 23 ideas will help you build a binder that fits your style, whether you're a cash-only person or a spreadsheet fan. Let's find your fresh start.
Free PDF Download
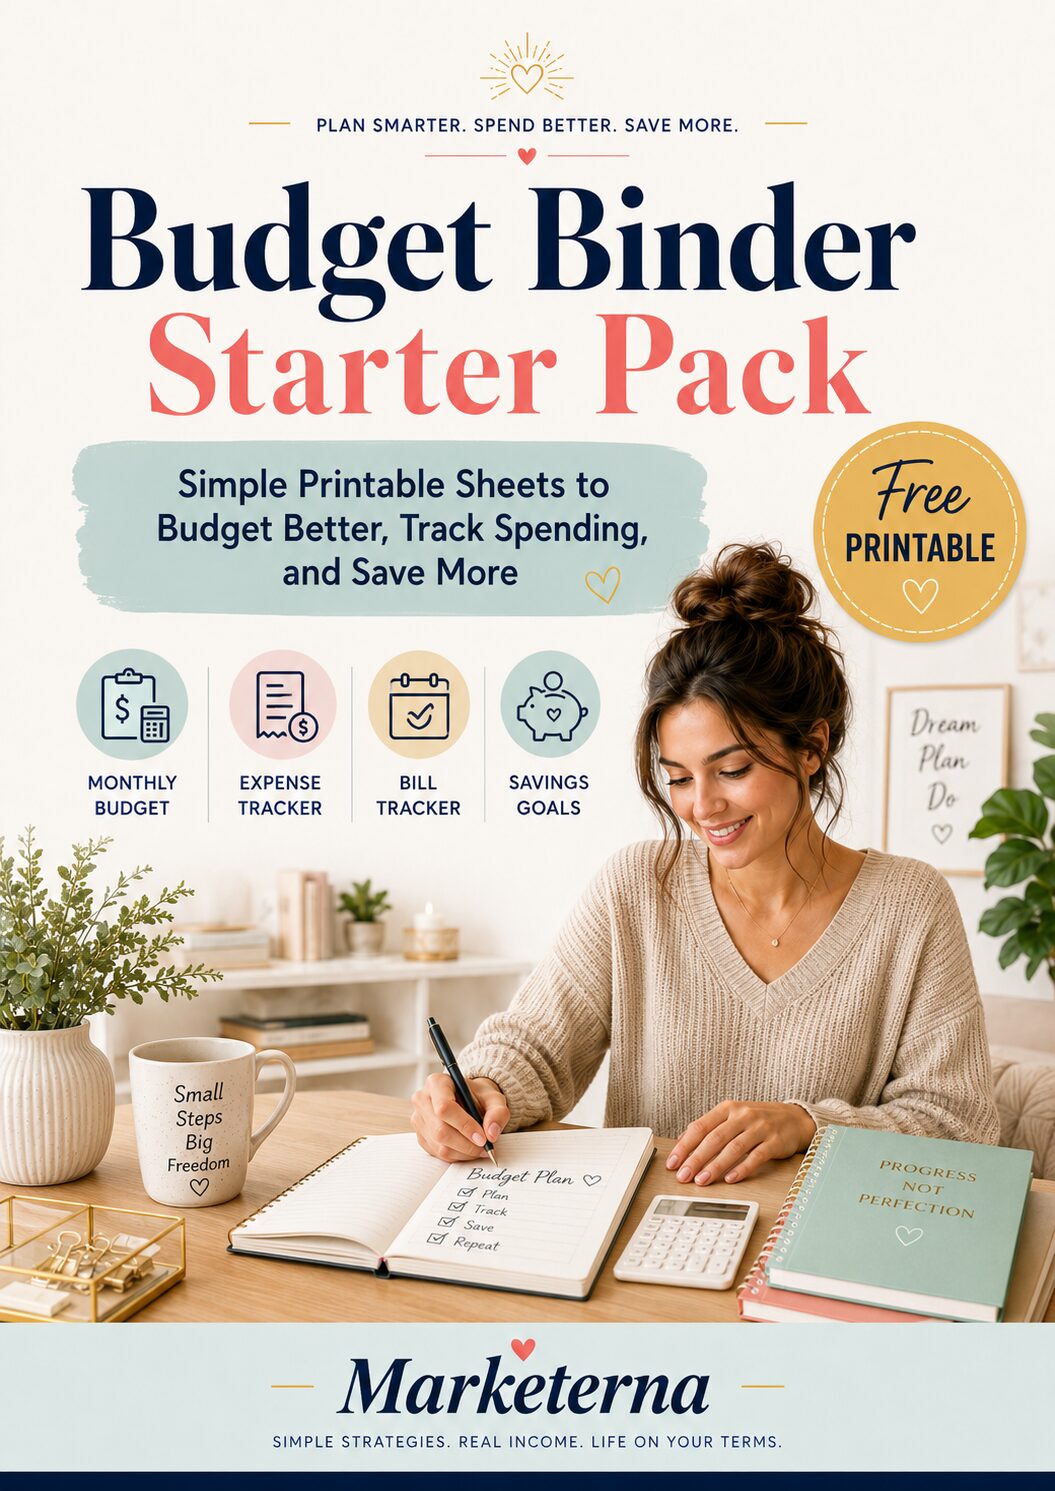
Get the Free Budget Binder Starter Pack
Download simple printable budget sheets to plan your monthly money, track expenses, organize bills, and start building better money habits without feeling overwhelmed.
You’ll get this free PDF plus access to the full Marketerna Save More & Earn More PDF Kit. No spam. Unsubscribe anytime.
1. The Classic Cash Envelope System
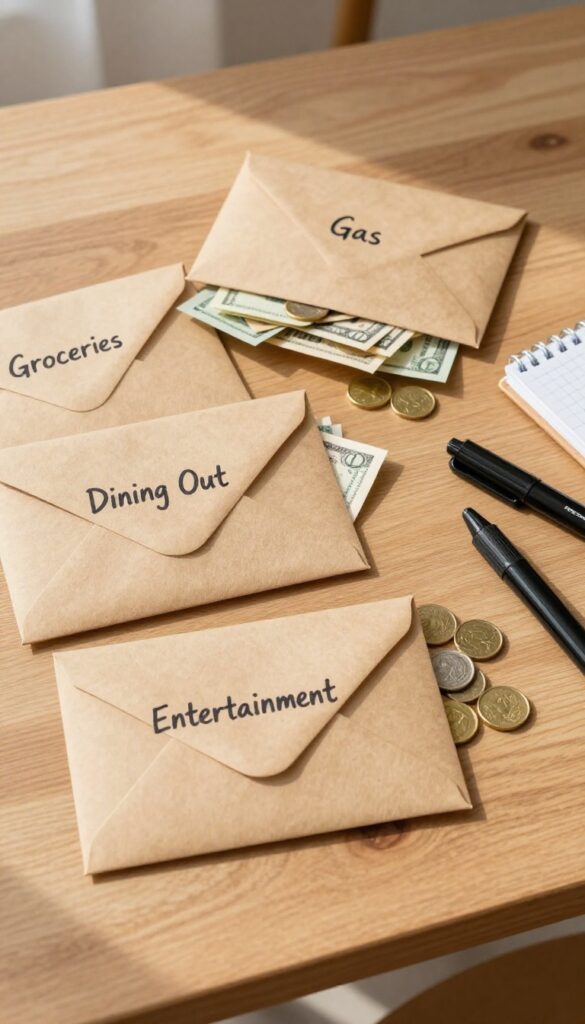
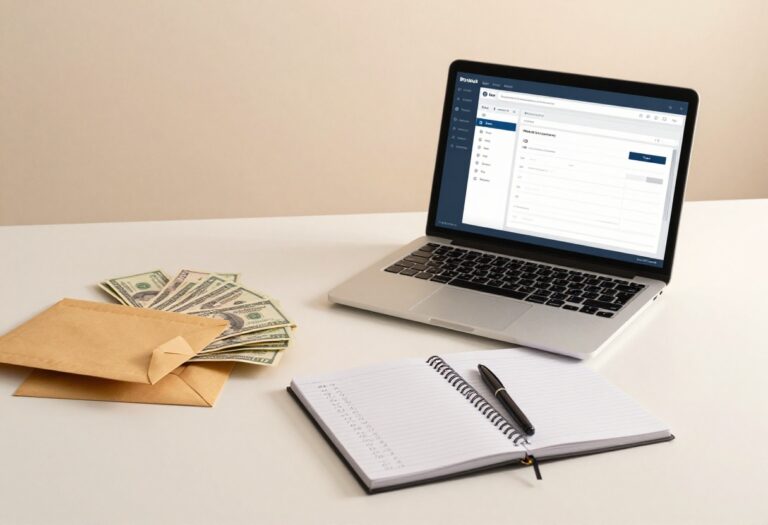
Sometimes the simplest method is the most effective. The cash envelope system is a tried-and-true way to control spending without needing an app or spreadsheet. You physically see your money leaving, which makes you think twice before handing it over.
To start, grab a few envelopes and label them with your spending categories—groceries, gas, dining out, and entertainment are good ones for beginners. Each payday, withdraw the amount you've budgeted for each category and stuff it into the matching envelope. When the envelope is empty, that's it—no more spending in that category until the next pay period.
Set Up Your Envelopes
Choose 3 to 5 categories that are your biggest spending leaks. Write the category name and a monthly budget on the front. Use a permanent marker so you can reuse the envelopes next month.
Stay Disciplined At The Store
Only bring the envelope for the category you're shopping for. Leave the others at home to avoid temptation. If you see something you want but don't have cash, it's a sign to wait.
What To Do With Leftover Cash
At the end of the month, roll leftover cash into next month's envelope or put it toward a savings goal. This small reward keeps you motivated.
2. The Digital Hybrid Binder
Not sure if you want to go fully digital or stick with paper? You don't have to choose. The digital hybrid binder gives you the best of both worlds: the satisfying tangibility of a physical binder plus the convenience of a spreadsheet or app for tracking on the go.
Print out your monthly budget overview and key goals to keep in your binder. Then use a free app like Google Sheets or a budgeting app to log daily expenses as they happen. Once a week, sit down with your binder, transfer the digital data onto your printed sheets, and reconcile.
This way you catch overspending early without losing the hands-on feel.
Why It Works
You get the accountability of writing things down without having to carry your binder everywhere. The digital side handles the messy real-time tracking, while the binder becomes your weekly review hub. It's a gentle system that builds consistency.
Setting It Up
Pick a simple binder with a few clear sections: monthly overview, weekly tracking, and goals. Create a matching digital spreadsheet with the same categories. Each evening, snap a quick photo of receipts or log amounts in your phone.
On Sunday, print a fresh sheet or update your binder pages.
Tools To Try
Google Sheets is free and syncs across devices. For apps, try EveryDollar or YNAB for automatic transaction imports. Pair with a binder that has a clear front pocket for receipts and a pen loop.
Keep it simple—no need for fancy printables.
Free PDF Download
Get the Free Budget Binder Starter Pack
Download simple printable budget sheets to plan your monthly money, track expenses, organize bills, and start building better money habits without feeling overwhelmed.
You’ll get this free PDF plus access to the full Marketerna Save More & Earn More PDF Kit. No spam. Unsubscribe anytime.
3. The Sinking Funds Binder
Irregular expenses can wreck a budget if you're not ready. Car repairs, holiday gifts, or vet bills often sneak up, leaving you scrambling. A sinking funds binder solves that by setting aside a little each month so those costs don't feel like emergencies.
The idea is simple: dedicate a section of your binder to irregular expenses. Use separate pockets, envelopes, or pages for each category. Each month, add a small amount based on what you expect to spend annually.
When the bill arrives, you have the cash ready.
Label Your Categories
Start by listing the irregular expenses you know are coming. Common ones include car maintenance, holidays, pet care, medical co-pays, and home repairs. Use sticky tabs or dividers to create a dedicated page or pocket for each.
Set Monthly Targets
Figure out how much you need for each category over a year, then divide by 12. For example, if you spend $600 on holiday gifts, set aside $50 each month. Write the target on the page or envelope so you know exactly how much to add.
Track Your Progress
Use a simple tracker inside each pocket. A small chart or checklist works great. Each month, mark the amount added and the running total.
When you spend from the fund, subtract it and note the date. This keeps you honest and motivated.
4. The Zero-Based Budget Layout
Every dollar needs a purpose—that's the whole idea behind zero-based budgeting. Instead of guessing where your money went, you assign each dollar a job before you spend it. A dedicated worksheet helps you track income, expenses, and savings until everything balances to zero.
It's a simple but powerful way to stay intentional.
Grab a printable zero-based budget worksheet or make your own in a notebook. List all your income at the top, then subtract every expense category until you reach zero. That doesn't mean you're broke—it means every dollar is assigned to something, whether it's bills, groceries, or fun money.
Review and adjust categories each month as your needs change.
Start With Your Monthly Income
Write down your total take-home pay for the month. If your income varies, use a conservative estimate or average the last three months. This number is your starting point.
List Every Expense Category
Break your spending into fixed costs (rent, utilities) and variable costs (groceries, eating out). Don't forget savings and debt payments. The goal is to cover everything with your income.
Balance To Zero
Subtract your total expenses from your income. If you have money left, assign it to a category like savings or debt. If you're short, cut back on variable categories until you hit zero.
Free PDF Download
Get the Free Budget Binder Starter Pack
Download simple printable budget sheets to plan your monthly money, track expenses, organize bills, and start building better money habits without feeling overwhelmed.
You’ll get this free PDF plus access to the full Marketerna Save More & Earn More PDF Kit. No spam. Unsubscribe anytime.
5. The Bill Tracker Dashboard
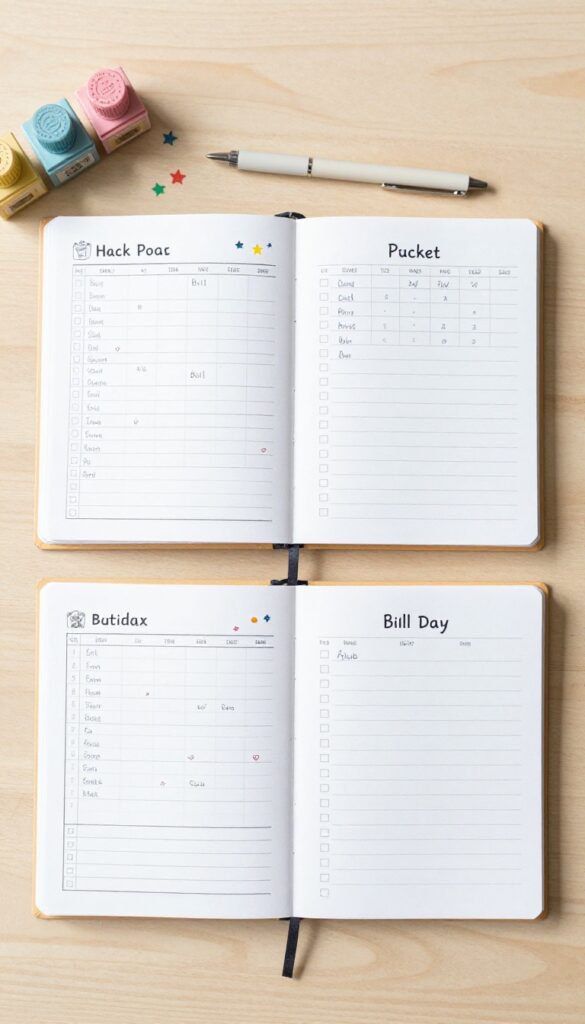
Nothing kills a fresh budget faster than a forgotten due date. Late fees add up, and that one missed payment can throw off your entire month. That's why the first page of your binder should be a bill tracker dashboard.
Set up a simple monthly calendar spread. List each bill, its due date, the amount, and a checkbox. As you pay, check it off.
This one page gives you a bird's-eye view of your month and keeps you accountable.
Choose Your Layout
You can go vertical with rows for each bill and columns for date, amount, and status. Or use a horizontal calendar grid with bill names written on the dates. Pick what feels natural to you.
Add A Paid Stamp Or Stickers
Make checking off bills satisfying. Grab a colorful stamp or a sheet of star stickers. Every time you mark a bill paid, you get a tiny win that keeps you motivated.
Plan For Variable Bills
Some bills change each month, like utilities or credit cards. Leave a space to write in the actual amount after the bill arrives. You can also add a column for the estimated amount versus the real one.
6. The Debt Snowball Tracker
Debt can feel like a weight that never lifts. But watching it shrink—literally—changes everything. The debt snowball method is simple: list your debts from smallest to largest, then attack the smallest one first while making minimum payments on the rest.
This tracker makes that progress visible and keeps you hooked on paying off more.
Grab a sheet of paper or a printable tracker. Write each debt with its total balance. Under each, draw a progress bar with 10 or 20 segments.
Every time you make a payment, color in a segment. When the bar is full, celebrate that debt as gone. Then move to the next one.
The visual payoff is surprisingly motivating—you'll want to see those bars fill up.
How To Set It Up
Print a debt tracker page or draw your own in your binder. List debts in order of smallest balance to largest. Add columns for minimum payment, total owed, and due date.
Then draw a simple progress bar next to each debt—ten squares works well. Each payment fills one square.
Why It Works
Small wins build momentum. Paying off a $200 credit card feels amazing, and that feeling carries you to the next debt. The progress bar gives you a daily reminder that you're moving forward, even when the total seems huge.
Make It Your Own
Use different colors for each debt—green for paid, yellow for in progress. Add a reward for each debt paid off, like a coffee or a movie night. You can also include a section for extra payments so you see how throwing in an extra $20 speeds things up.
7. The Savings Goal Thermometer
Saving money can feel abstract until you see real progress. A savings goal thermometer turns your target into a visual tracker that makes each deposit feel like a win. Draw a simple thermometer on a page, mark your goal at the top, and shade it as you get closer.
Whether it's an emergency fund or a dream vacation, watching that red line rise is surprisingly satisfying.
This idea works because it gives you a clear visual of your progress. Every time you add money, you color in a little more. It's like a game where you're always winning.
Plus, it keeps your goal front and center, so you're less likely to dip into those funds.
How To Set It Up
Grab a blank page in your binder and draw a vertical thermometer shape. At the top, write your savings goal amount. Divide the thermometer into segments representing smaller milestones—like every $100 or 10% of your goal.
Each time you save, shade in the corresponding segment. Use a red marker for that classic thermometer look.
Make It Work For Any Goal
You can have multiple thermometers for different goals. One for your emergency fund, another for a vacation, maybe one for holiday gifts. Just label each clearly and track them separately.
It's a great way to prioritize and see which goal is heating up fastest.
Keep It Motivating
Place the thermometer page where you'll see it every time you open your binder. You can even add stickers or small rewards for hitting milestones. The visual progress is powerful—it turns saving into a habit you actually look forward to.
8. The Weekly Meal Planner + Grocery Budget
Food is one of the biggest budget busters—especially when you're winging it. A weekly meal planner paired with a grocery budget tracker keeps you on track without feeling like a chore. The trick is to plan around what's on sale and stick to your list like glue.
Start by checking store ads or apps for deals. Build your meals around those proteins and produce. Then, write down exactly what you need—no extras.
When you shop, only buy what's on the list. This simple habit can cut your grocery bill by 20% or more.
Plan From Sales, Not Cravings
Flip through the weekly flyer before you plan meals. If chicken is on sale, that's your protein for the week. Build meals around that base—think stir-fries, salads, or sheet pan dinners.
This keeps your grocery list short and your wallet happy.
Use A Simple Two-column Layout
On one binder page, list the days of the week and what you'll eat for dinner. On the other side, write your grocery list grouped by store section (produce, dairy, meat, pantry). This layout makes shopping fast and prevents backtracking.
Set A Hard Grocery Budget
Decide on a weekly number—say $75 for one person or $150 for a family of four. Write it at the top of your grocery page. As you add items, estimate costs.
If you go over, swap a pricier ingredient for a cheaper one. No exceptions.
9. The No-Spend Challenge Log
A no-spend challenge is like a reset button for your wallet. You pick a set period—maybe a week or a month—and avoid spending on anything that isn't a true necessity. The goal isn't deprivation; it's awareness.
You'll quickly see where your money usually leaks and how much control you actually have.
Track your progress with a simple calendar or a habit tracker page in your binder. Mark each day you succeed with a big X or a sticker. Watching that streak grow is surprisingly motivating.
Start small—try a no-spend weekend first, then work up to a full week or month.
Set Your Rules
Define what counts as a necessity. Rent, utilities, groceries, and gas are usually okay. Takeout, coffee runs, new clothes, and streaming subscriptions are not.
Write your personal yes/no list on a binder page so there's no confusion mid-challenge.
Track Your Wins
Use a monthly calendar template or a habit tracker grid. Color in each successful day. Seeing a full row of green squares at the end of the month feels amazing.
If you slip, just start again the next day—no guilt, just momentum.
Reflect And Adjust
After your challenge, jot down what you learned. Did you miss your daily latte or realize you didn't need it? Use those insights to adjust your regular budget.
The no-spend log isn't just a challenge—it's a teaching tool.
10. The Side Hustle Income Tracker
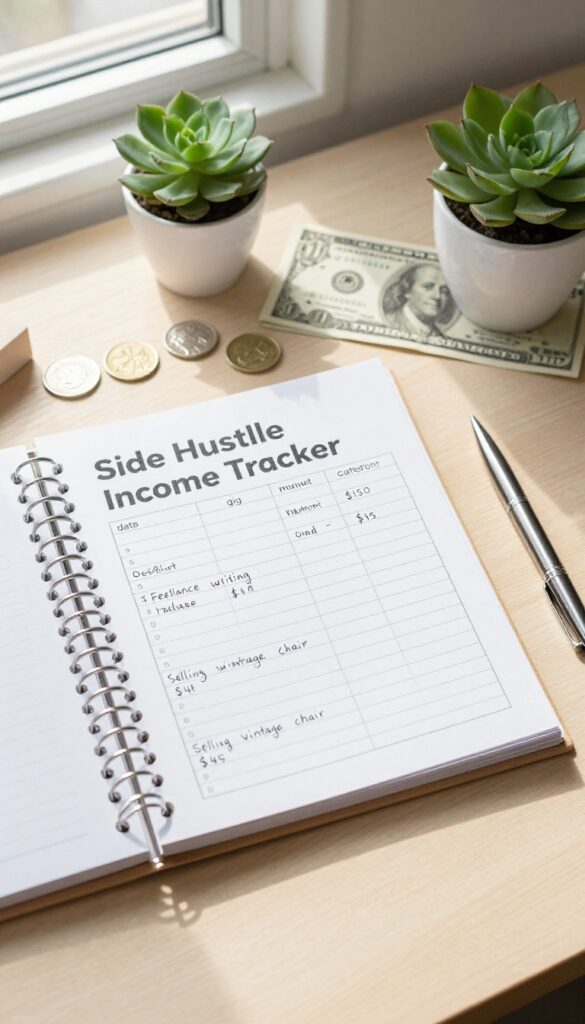
Side hustles can feel like a chaotic stream of random payments—$50 here, $20 there. Without a system, that extra cash tends to disappear into everyday spending. A dedicated tracker turns your gig income into a tool for progress, not just pocket change.
This page isn't about micromanaging every dollar. It's about seeing the bigger picture of your hustle earnings and making intentional choices. You'll decide upfront how much goes to savings, debt, or fun money, so your hard work actually moves you forward.
Set up a simple log with columns for date, gig, amount, and category (e. g. , freelance, selling items, odd jobs). At the end of each month, total it up and split it according to your preset percentages. This keeps your side income from feeling like Monopoly money and turns it into real financial fuel.
Choose Your Split
Before you even track a single dollar, decide your allocation. A common rule is 50% to savings or debt, 30% to fun money, and 20% to reinvest in your hustle. Write those percentages on the tracker page so every deposit has a clear job.
Log It Before You Spend It
The moment a payment hits your account, log it. Use a simple notebook page or a printed template. This habit prevents the classic mistake of treating side cash as "extra" that vanishes without a trace.
Review And Adjust Monthly
At month's end, look at your totals. Did you hit your savings goal? Is your fun money pile bigger than expected?
Tweak the splits as your income changes. The tracker keeps your side hustle working for your goals, not against them.
11. The Monthly Expense Breakdown
Once the month wraps up, it's time to get honest with your numbers. A monthly expense breakdown helps you see exactly where your money went—not where you think it went. This is your reality check, and it's the only way to know if your budget is working or just wishful thinking.
Pull out all your receipts, bank statements, and spending logs from the past month. List every expense category—groceries, utilities, dining out, subscriptions—and total each one. Then compare those totals to the budget you set at the start of the month.
The gaps will jump out at you, and that's the whole point.
Spot The Leaks
That daily coffee run or the streaming service you forgot about? They show up loud and clear in a breakdown. Seeing the numbers in black and white makes it easier to decide which habits to keep and which to cut.
Adjust For Next Month
Use your breakdown to tweak your budget. If you went over on groceries, maybe you need a higher grocery limit or a stricter meal plan. If utilities were lower than expected, shift that extra cash to savings or debt.
The breakdown is your guide for next month's plan.
12. The Year-at-a-Glance Overview
Big expenses don't care about your monthly budget. They show up once or twice a year and can wreck your savings if you're not ready. A year-at-a-glance page helps you see the full picture so nothing sneaks up on you.
Think of it as your financial calendar. You map out every known cost—birthdays, holidays, insurance renewals, car registration—and plan for them months in advance. No more scrambling in December.
Dedicate one page in your binder to a 12-month grid. List each month and jot down the big expenses you expect. Include birthdays, holidays, insurance premiums, property taxes, annual subscriptions, and any known large purchases like a new laptop or vacation.
This gives you a bird's-eye view of your cash flow for the entire year.
How To Set It Up
Grab a piece of paper or print a free yearly calendar template. Write the months down the left side. Across the top, create columns for categories like Family, Home, Auto, Health, and Gifts.
Fill in each cell with the estimated cost and due date. Use a highlighter to mark months that look heavy.
Review And Adjust Monthly
Pull out this page during your monthly budget review. Compare your actual spending to your year-at-a-glance predictions. If you forgot a big expense, add it now.
This keeps your overview accurate and helps you shift money between months when needed.
Why It Works So Well
Most people budget month to month and get blindsided by annual costs. A year-at-a-glance turns those surprises into planned expenses. You can set aside a little each month into a sinking fund, so when December hits, you're ready for holiday spending without the panic.
13. The Paycheck Breakdown Page
Getting paid can feel great—until you wonder where it all went by the end of the month. A paycheck breakdown page solves that by giving every dollar a job the moment it lands. It's a simple way to connect each pay period to your bigger financial picture.
This page is all about clarity. When you get paid, you list every single expense that will come out of that check before you spend a cent. Think of it as a mini-budget for each paycheck that feeds into your monthly plan.
It stops the guessing and helps you stay on track with savings, bills, and fun money.
How To Set It Up
Grab a page in your binder and write the paycheck date at the top. Then split the page into two columns: 'Must-Pay' and 'Flexible. ' In the first column, list fixed costs like rent, utilities, and debt payments. In the second, put variable stuff like groceries, gas, and entertainment.
Total each column and subtract from your paycheck amount. What's left can go straight to savings or a goal.
Match Paychecks To Monthly Goals
If you get paid twice a month, assign each paycheck a role. Maybe the first one covers housing and utilities, while the second handles food and fun. This way, you're not scrambling at the end of the month.
Update your monthly goal tracker in the binder so you can see how each paycheck moves you closer to your targets.
Track And Adjust
After the paycheck period ends, compare what you planned to what actually happened. Did you spend more on dining out? Less on gas?
Note it on the page. Over time, you'll get better at estimating. This isn't about perfection—it's about learning your patterns so you can adjust for next time.
14. The Bill Pay Checklist
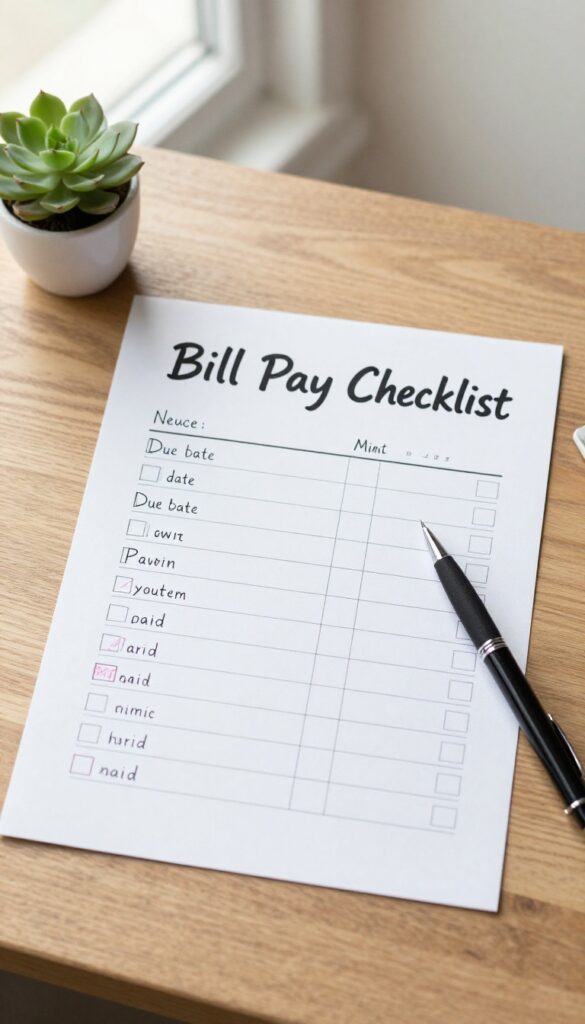
Bills have a way of sneaking up on you. One minute you think you're on top of everything, the next you're paying a late fee for a utility you forgot about. A bill pay checklist turns that chaos into a simple, trackable system.
This isn't just a list—it's a visual progress tracker. Each bill gets its own row with columns for the due date, amount, payment method, and confirmation number. As you pay, you check it off.
That small act of checking feels surprisingly satisfying and keeps you accountable.
Start by listing every recurring bill you have—rent, utilities, subscriptions, insurance, loans. Then create columns for: due date, amount owed, payment method (e. g. , auto-pay, online, check), and confirmation number. Leave a checkbox column on the left.
Print one copy per month or use a dry-erase sheet for reuse. When you pay a bill, fill in the confirmation number and check the box. At a glance, you can see what's paid and what's still pending.
No more digging through emails or bank statements to confirm a payment.
Set Up Your Columns
Use a simple table layout. Columns: Bill Name, Due Date, Amount, Payment Method, Confirmation #, Checkbox. Keep it clean—no clutter.
You can add a notes column if you want to track autopay dates or account numbers.
Make It A Routine
Pick a day each week to sit down with your checklist. Pay what's due, update the confirmation numbers, and check the boxes. Sunday evenings work great for many.
The routine turns bill paying from a dreaded chore into a quick, satisfying task.
Use It For Budget Reviews
At month's end, your checklist doubles as a spending record. Compare the amounts to your budget categories. Did you overspend on utilities?
Notice a subscription you forgot about? The checklist makes these insights obvious.
15. The Cash Stuffing Dividers
Cash stuffing is making a comeback, and for good reason—it's visual, tactile, and makes you feel every dollar leaving your hand. Binder dividers with clear pockets turn your budget binder into a physical envelope system without the bulk of separate envelopes. You can see exactly how much is left for groceries, gas, or fun money just by flipping to the right tab.
This method works especially well if you're a visual learner or tend to overspend with cards. On payday, you withdraw your budgeted cash amounts and slide them into the labeled pockets. When the cash is gone, that category is done—no dipping into savings or next month's rent.
Pick Your Categories
Start with 5–7 core categories like groceries, dining out, gas, personal care, and entertainment. Use one divider per category. Write the category name on a sticky label or use a permanent marker on the tab.
Keep it simple—too many categories can get overwhelming.
Label And Load
Write the budgeted amount on the divider itself or on a small card tucked inside the pocket. On payday, withdraw cash and stuff each pocket with the exact amount. No need to sort coins—just bills.
The clear pocket lets you see at a glance if you're running low.
Track And Adjust
At the end of the month, empty the pockets and count what's left. If you consistently have leftover cash in one category, adjust your budget. If another pocket is always empty before the month ends, consider reallocating funds.
This feedback loop helps you fine-tune your spending habits.
16. The Net Worth Tracker
This page isn't about your monthly coffee spending—it's about the big picture. A net worth tracker shows you the real impact of all those small budgeting wins. Every debt payment, every extra dollar saved adds up, and this page makes that visible.
Quarterly, list your assets (savings, investments, home value) and liabilities (debts). Subtract to see your net worth grow over time.
What To Include
Assets: checking and savings accounts, retirement funds, home equity, car value, any other investments. Liabilities: mortgage, student loans, credit card balances, car loans, personal loans. Be honest—rounding up assets or downplaying debt only hurts you.
How Often To Update
Quarterly is perfect. Monthly is too frequent for most people (home values don't change that fast), and yearly misses the motivation boost. Pick the same months each year—like January, April, July, October—so it becomes a habit.
Celebrate The Trend
Don't stress if your net worth dips in the first quarter after you buy a house or car. That's normal. Focus on the upward trend over time.
Watching that number climb is seriously motivating and makes all those little budget sacrifices worth it.
17. The Subscription Audit Page
Subscriptions are the silent budget killers. A $10 streaming service here, a $5 app there—they add up fast, often without you noticing. This page helps you take back control by listing every single subscription, its cost, and how often you actually use it.
You might be surprised how many you can cancel.
Create a dedicated page in your binder for subscriptions. List each service, its monthly or annual cost, and how often you use it (daily, weekly, rarely, never). Highlight the ones you can cancel to free up cash.
This simple audit can save you hundreds a year.
How To Track
Go through your bank and credit card statements for the last three months. Write down every recurring payment. Include streaming services, apps, gym memberships, meal kits, and even that old magazine subscription you forgot about.
The Cancel Column
Add a column for "Cancel? " with a simple yes or no. Be honest about what you actually use.
If you haven't opened an app in six months, it's time to let it go. You can always resubscribe later if you miss it.
Savings Goal
At the bottom of the page, total the cost of subscriptions you plan to cancel. Write that number as a savings goal. Redirect that money to your emergency fund or a debt payment.
It's like giving yourself a raise.
18. The Envelope Liner System
If you love the idea of cash envelopes but don't want to carry a bulky wallet, this system is for you. You glue or tape envelopes directly onto binder pages, creating a flat, organized cash management system. Each envelope holds cash for a specific category—groceries, gas, dining out—and you write the running balance on the outside with a dry-erase marker or sticker.
This method keeps your cash visible and your spending honest. When the envelope is empty, that category is done for the month. No overspending, no guessing.
Plus, it's easy to rearrange or swap envelopes as your budget evolves.
How To Set It Up
Start with a binder and clear page protectors. Take standard #10 envelopes, glue them onto cardstock, and slide the cardstock into the protectors. Or use adhesive envelopes made for planners.
Label each envelope with a category (Groceries, Gas, Fun Money). Write the starting balance on the outside, and update it each time you spend.
Why It Works
The envelope liner system combines the tactile feedback of cash with the structure of a binder. You physically see money leaving the envelope, which makes you think twice before impulse buys. And because the envelopes are inside a binder, they stay neat and don't get crumpled in your purse.
Pro Tips For Success
Use a different colored envelope for each category to make them easy to spot. Keep a small dry-erase marker in the binder's pen loop for quick balance updates. If you have leftover cash at month's end, roll it over or put it toward savings.
19. The Monthly Reflection Sheet
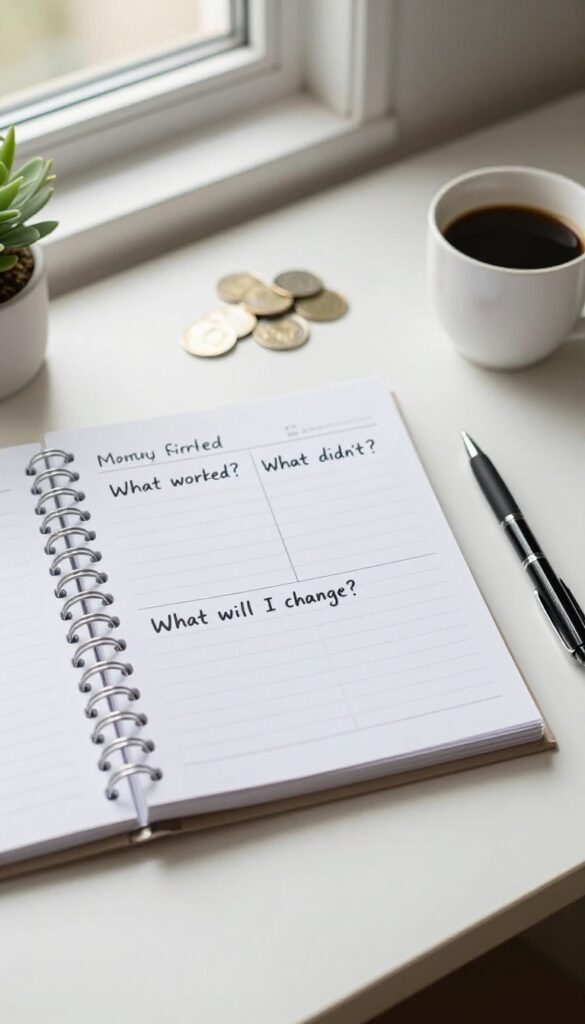
After each month, answer three questions: What worked? What didn't? What will I change?
This turns budgeting into a learning habit. You stop guessing and start noticing patterns—like how takeout spikes during stressful weeks or why you always overshoot the grocery budget.
Set Up Your Sheet
Print a simple template with three columns—one for each question. Or just use a blank page. Keep it in the front pocket of your binder so you don't forget.
Fill it out on the same day each month, maybe the last day or the first of the next month.
Be Brutally Honest
No sugarcoating. If you blew your fun money on a concert ticket, write it down. If you saved by cooking at home, note that too.
The goal is to spot what actually works for your life, not what you think should work.
Use The Answers
Before you set next month's budget, glance at your reflection sheet. Adjust categories based on what you learned. Maybe you need a bigger grocery buffer or a separate 'emergency takeout' fund.
Small tweaks add up fast.
20. The Goal Setting Page
A budget without goals is like a car without a destination—you'll drive around but never really arrive. This page turns your binder into a vision board for your finances, giving every dollar a purpose beyond just paying bills.
Write down your top three financial goals for the year. Break each into monthly action steps. Revisit this page often to stay motivated and on track.
Pick Your Top Three
Start by choosing three big financial goals for the year. Maybe it's building a $5, 000 emergency fund, paying off a credit card, or saving for a down payment. Keep them specific and realistic.
Write each goal on its own line with a target date.
Break It Down Monthly
Big goals can feel overwhelming, so slice them into monthly action steps. For example, if your goal is to save $5, 000 in a year, that's about $417 per month. Write that number next to the goal.
Then list one or two small actions you'll take each month to make it happen.
Check In Regularly
Set a recurring reminder to revisit this page every week or month. Use it to track progress, adjust steps if needed, and celebrate wins. Seeing your goals in your binder keeps them front and center, making it easier to say no to impulse buys.
21. The Irregular Income Tracker
Freelancers, gig workers, and commission-based earners know the pain of feast-or-famine months. A budget that assumes a steady paycheck can leave you scrambling when a slow month hits. That's where the Irregular Income Tracker comes in—a dedicated page in your binder that helps you smooth out the highs and lows.
Start by creating a simple table with columns for date, source, amount, and running total. Every time you get paid—whether it's $50 from a side gig or $2, 000 from a client—log it immediately. At the end of each month, calculate your average monthly income over the past three to six months.
Then base your core budget on your lowest-earning month. Anything extra becomes a bonus for savings or guilt-free spending.
Why Average Matters
Averaging prevents you from overspending in high months and under-saving in low ones. It gives you a realistic baseline that keeps your bills covered even when work slows down.
How To Handle Surplus
When you earn more than your baseline, decide ahead of time where that extra goes. A simple rule: 50% to savings, 25% to debt, 25% to fun. Write this plan on your tracker page so you're not tempted to blow it all.
Track Your Trends
After a few months, look for patterns. Maybe you always have a slow January or a busy summer. Use that knowledge to plan ahead—set aside extra cash during peak months to carry you through the lean ones.
22. The Receipt Pocket System
Receipts have a way of piling up in wallets, car consoles, and random drawers until tax season turns into a scavenger hunt. This system gives every slip a designated home inside your binder, so you can stop worrying about lost proof of purchase and start catching spending patterns before they become problems.
The concept is simple: attach a zippered pouch or a clear pocket to your binder's interior. Every time you get a receipt, tuck it in immediately—no sorting, no deciding. Then, once a week, pull them out and reconcile against your budget categories.
This weekly habit reveals where your cash actually went versus where you thought it went.
Choose Your Pouch
Pick a pouch that attaches securely—either a zippered binder pocket or a stick-on envelope. Size matters: too small and you'll be cramming; too large and it becomes a black hole. A 6×9 inch clear zippered pouch works well because you can see when it's getting full.
Weekly Reconciliation Routine
Set a recurring 15-minute appointment every Sunday. Empty the pouch, sort receipts by category (groceries, gas, dining out, etc. ), and compare each amount to your budget. Highlight any that exceed your planned spending—those are your leaks.
Then file the receipts in a monthly divider or scan and shred.
Bonus: Digital Backup
For high-value receipts (electronics, appliances, major repairs), snap a photo and store it in a cloud folder before filing the paper copy. This way, if the paper gets lost, you still have the record for warranties or returns.
23. The Mini Binder on the Go

Your main budget binder might be a full-size beast that lives on your desk. That's great for monthly planning, but what about when you're out shopping or running errands? You don't need the whole thing with you—just the essentials.
A mini binder solves that problem without adding bulk to your bag.
A mini binder is exactly what it sounds like: a smaller version of your main binder that you can toss in your purse or backpack. It holds only what you need for daily spending—your cash envelopes and a simple spending log. No extra sections, no weight.
Just the tools to track your money in real time. This approach keeps you accountable without the overwhelm. When you're at the store, you can quickly check your envelope balance or jot down a purchase.
At the end of the day, you transfer those notes back to your main binder. It's a simple bridge between your budget and real life.
What To Include
Stick to the bare minimum: a few cash envelopes for categories you spend from most often (groceries, dining out, gas) and a small notebook or printed log for recording transactions. That's it. Resist the urge to add extra sections—the whole point is portability.
Choosing The Right Binder
Look for a binder that's around 5×8 inches or smaller. A slim A5 or personal-size binder works well. Make sure it has a secure closure, like a zipper or elastic band, so nothing falls out.
Clear plastic envelopes or card sleeves keep your cash organized and visible.
How To Sync With Your Main Binder
At the end of each day (or every few days), transfer your spending log entries to your main binder's ledger or app. Update envelope balances accordingly. This habit takes just a few minutes and keeps your big-picture budget accurate without carrying it everywhere.
FAQ
What do I need to start a budget binder?
You need a 3-ring binder, tab dividers, and printable budget sheets. Optional: envelopes, a hole puncher, and pens. Start simple and add as you go.
How often should I update my budget binder?
Update it weekly to track spending and monthly to review your budget. Payday is a great time to set up the next month's pages.
Can I use a budget binder if I'm not good with numbers?
Absolutely. The binder is designed to make numbers visual and manageable. Start with just tracking expenses, then move to planning.
Should I use cash or digital tracking with my binder?
Either works. Cash envelopes help with overspending, while digital tracking is convenient. Many people use a hybrid of both.
How do I stay consistent with my budget binder?
Keep it visible and make it a habit. Spend 10 minutes each Sunday reviewing it. Link it to a routine like morning coffee or evening wind-down.
Conclusion
Starting your budgeting journey doesn't require a perfect system—just one binder idea that clicks. Pick the method that feels least intimidating, whether it's the cash envelope system or a simple monthly dashboard. Give it a month of consistent use, then tweak as needed.
The real win isn't a flawless budget; it's building the habit of paying attention to your money. Your fresh start begins with that first page.
Free PDF Download
Get the Free Budget Binder Starter Pack
Download simple printable budget sheets to plan your monthly money, track expenses, organize bills, and start building better money habits without feeling overwhelmed.
You’ll get this free PDF plus access to the full Marketerna Save More & Earn More PDF Kit. No spam. Unsubscribe anytime.