20 Blog Content Ideas for Your First 90 Days Online
Starting a blog feels exciting until you stare at a blank screen wondering what to write. The first 90 days are about building momentum, not perfection. You do not need a fancy camera or a big budget to publish useful posts.
This list gives you 20 specific ideas you can write in one sitting. Each one is designed to be quick, helpful, and easy to promote. Pick a few, tweak them for your niche, and get them live.
Your only job right now is to show up consistently. These ideas make that a whole lot easier.
Free PDF Download
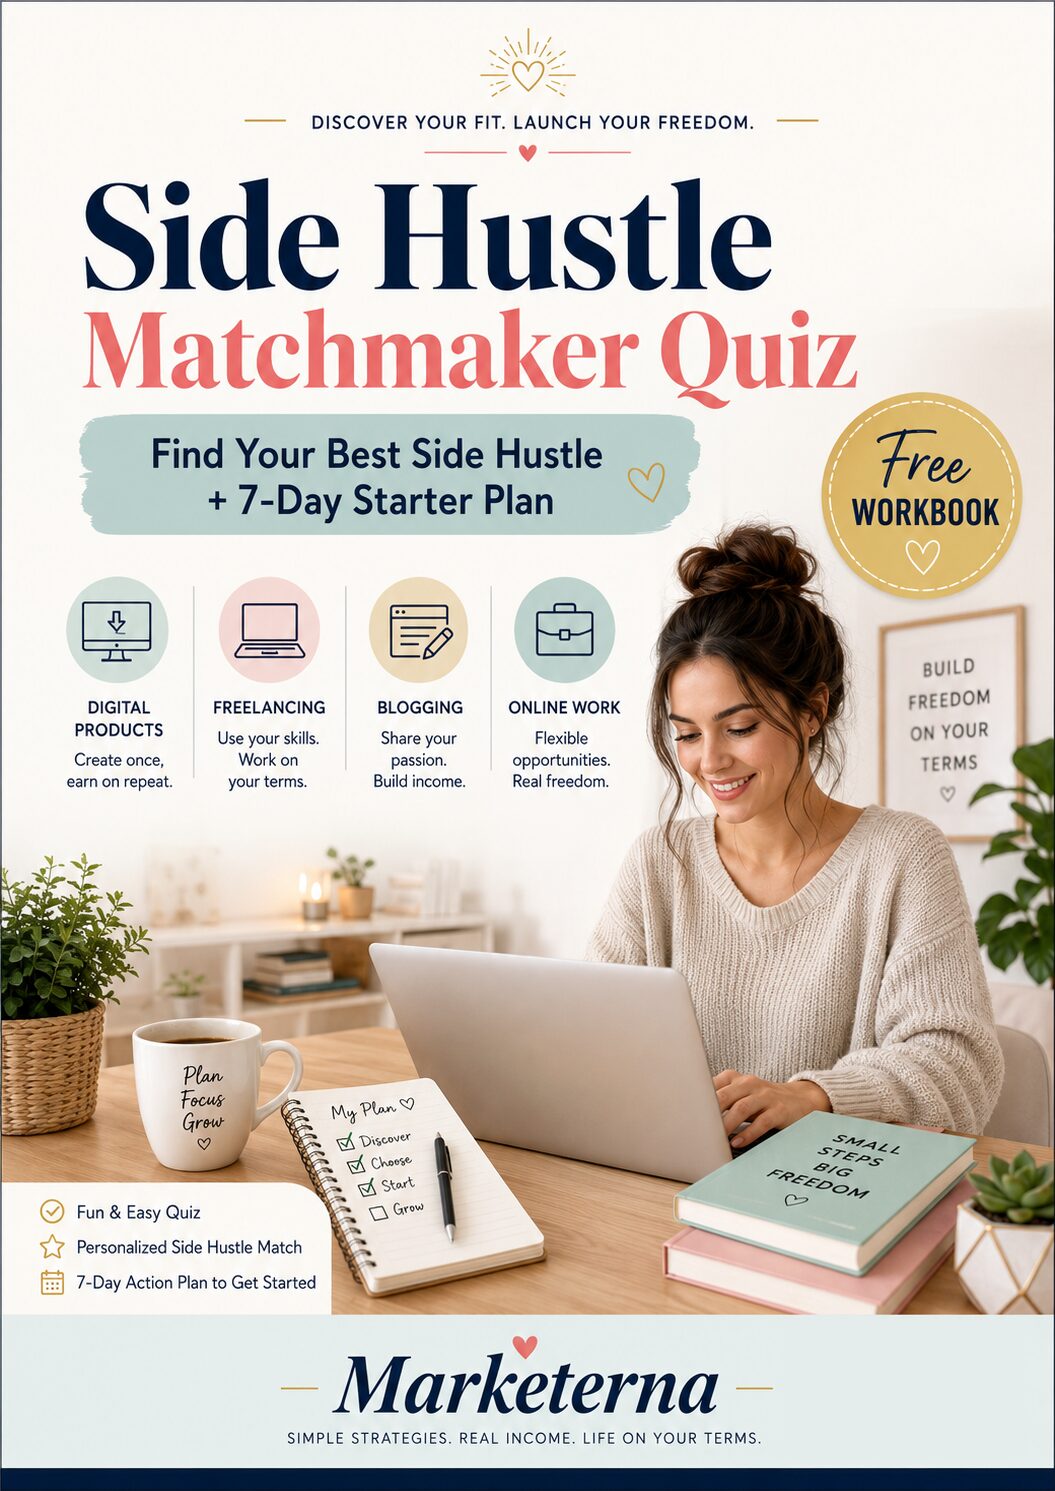
Not Sure Which Side Hustle Fits You Best?
Take the free Side Hustle Matchmaker Quiz and get a simple 7-day starter plan to help you choose a beginner-friendly idea based on your time, skills, comfort level, and goals.
You’ll get this free PDF plus access to the full Marketerna Save More & Earn More PDF Kit. No spam. Unsubscribe anytime.
1. Share Your Origin Story (Why You Started This Blog)

Every blog has a starting point, and yours is worth telling. Readers connect with the reason behind the work, not just the work itself. A simple post about why you hit publish can set the tone for everything that follows.
You do not need a dramatic tale. Maybe you got tired of bad advice, wanted to document a hobby, or just needed a place to think out loud. That honesty is what makes people stick around.
This is also a chance to say what you are still figuring out. Nobody expects you to have all the answers in the first 90 days. Sharing the messy middle makes your blog feel human.
Your origin story does not have to be long or polished. A few paragraphs about the moment you decided to start can do more than a dozen how-to posts. It gives readers a reason to care about where you are going.
Think about the problem you wanted to solve or the question you could not stop asking. That is usually the seed of a good blog. Write it down the way you would tell a friend over coffee.
You can also mention what you hope to learn. That turns your blog into a shared journey instead of a one-way lecture. People love following someone who is figuring things out in real time.
The Moment You Decided To Start
Describe the specific trigger that made you open a new document or buy a domain. Maybe it was a frustrating conversation, a late-night idea, or a book that changed your mind. Keep it concrete and short.
That single moment gives your blog a clear starting line.
What You Are Still Figuring Out
List two or three things you do not have figured out yet. It could be your posting schedule, your niche, or how to grow an audience. Being upfront about the unknowns makes you relatable.
Readers often stick around to see how those questions get answered.
What Readers Can Expect From You
Give a quick preview of the kind of posts you plan to write. Will you share tutorials, personal essays, or weekly roundups? A simple promise helps people decide to follow along.
Keep it flexible so you do not box yourself in.
2. List 10 Tools You Actually Use Every Day
You already have a handful of tools you open without thinking. Turning those into a blog post gives readers a real look at how you work. It also saves you from pretending you use some fancy software you barely touch.
This idea works because it is honest. People love seeing the actual stack behind someone's daily routine. Pick ten tools you genuinely use, and write a few lines about why each one earns its spot.
The trick is to keep it personal. Do not just list names and prices. Share what problem each tool solves for you and when you reach for it.
You can organize the list by how you use them: writing, planning, and staying organized. That makes it easy for readers to scan and find what fits their own workflow.
Tools For Writing
Start with whatever you type into every day. Maybe it is a simple notes app, a distraction-free editor, or a grammar checker. Explain why it beats the alternatives for your style.
If you use a free tool, say so. Readers appreciate knowing they can try it without spending money.
Tools For Planning
This is where you talk about your calendar, task manager, or content calendar. Show how you decide what to work on next. A quick screenshot or a short description of your setup goes a long way.
Tools For Staying Organized
Cover the behind-the-scenes stuff: file storage, bookmark managers, or a simple to-do list. Mention one small habit that makes the tool actually useful. That is the part people remember.
Free PDF Download
Not Sure Which Side Hustle Fits You Best?
Take the free Side Hustle Matchmaker Quiz and get a simple 7-day starter plan to help you choose a beginner-friendly idea based on your time, skills, comfort level, and goals.
You’ll get this free PDF plus access to the full Marketerna Save More & Earn More PDF Kit. No spam. Unsubscribe anytime.
3. Write a Beginner's Guide to Your Main Topic
Most people who land on your blog for the first time know less than you think. They are not ready for advanced tips or deep dives. They just want someone to explain the basics without making them feel dumb.
That is exactly what a beginner's guide does. It gives new readers a clear starting point and quietly proves you know what you are talking about. Write it like you are helping a friend who just asked, "So what is this thing, anyway?
" Keep it simple, skip the jargon, and answer the questions you had when you started.
A beginner's guide works because it meets people where they are. It also gives you one solid post you can link to again and again whenever you mention the basics. You do not need to cover everything.
Pick the five or six things a total newbie actually needs to know, then explain each one in a few short paragraphs.
Start With The Questions People Actually Ask
Think back to when you knew nothing about this topic. What confused you first? What did you Google at 11pm?
Those questions make great section headings. Things like "What is it? " "Why does it matter?
" and "How do I get started? " cover most of what a beginner needs.
Define The Jargon In Plain Words
Every niche has its own language, and it scares new people away. Use simple terms first, then mention the technical word in parentheses if you have to. For example, instead of "optimize your conversion funnel, " say "make it easier for people to sign up.
" Same meaning, way less intimidating.
End With One Clear Next Step
Beginners freeze when they have too many options. Give them a single action to take after reading. Maybe it is signing up for one tool, trying one simple exercise, or reading your next post.
One step keeps them moving instead of overwhelmed.
4. Document One Week of Learning Something New

Pick a skill you have been meaning to learn and give it seven days. Then write about the whole messy process, day by day. The value here is not expertise.
It is the honest record of a beginner figuring things out, which is exactly what your readers are doing too. People trust someone who shows the stumbles instead of just the highlight reel. A week is short enough to finish and long enough to have real ups and downs.
The Daily Recap Format
Give each day its own short block with what you tried and how it went. Keep it to a few sentences so readers can skim the whole week in a minute. End each day with one takeaway, even if the takeaway is that you have no idea what you are doing yet.
That honesty is the hook.
Show The Flops
The day something broke or you got stuck is usually the most interesting part. Describe what went wrong and what you did next. Readers learn more from your mistakes than your wins, and it makes your eventual progress feel earned.
Wrap It With What Is Next
Close the post with what you plan to try in week two and invite readers to follow along. This sets up a natural follow-up post and gives people a reason to come back. Ask them what they are learning right now so the comments turn into a conversation.
Free PDF Download
Not Sure Which Side Hustle Fits You Best?
Take the free Side Hustle Matchmaker Quiz and get a simple 7-day starter plan to help you choose a beginner-friendly idea based on your time, skills, comfort level, and goals.
You’ll get this free PDF plus access to the full Marketerna Save More & Earn More PDF Kit. No spam. Unsubscribe anytime.
5. Answer the Top 5 Questions You Get From Friends
Your friends are basically a free focus group. They ask the same few questions every time your blog comes up, and those questions are gold for content. Write down the five you hear most.
Then answer each one the way you would over coffee, not the way a textbook would. This post works because it removes the pressure to sound impressive. You just explain what you know in plain words, and readers who are one step behind you will eat it up.
Start by listing the questions out loud or in a notes app. You will probably notice a pattern: people want the basics, the cost, and the time commitment. Answer each question in a short section.
Keep your answers honest, including the parts that are annoying or confusing. That honesty is what makes this post shareable. It feels like advice from a friend, not a sales pitch.
Pull The Questions From Real Conversations
Scroll through your texts or think back to the last few times someone asked about your topic. Write those questions down word for word. Using their exact phrasing makes the post easier to find and easier to read.
Answer Like You Are Talking, Not Teaching
Skip the jargon and the long wind-up. Give the short answer first, then add one or two details that help it make sense. If you would not say it out loud to a friend, cut it.
End With The Question You Wish They Asked
Add one bonus question you get less often but love answering. It gives the post a little extra value and shows off your knowledge without turning it into a lecture.
6. Review a Free Resource You Actually Finished
You've probably downloaded a free ebook or signed up for a mini-course and never touched it again. But there's one you actually completed—and that's worth writing about. A review of a free resource you finished gives your readers a real recommendation they can trust, because you did the work and can speak from experience.
The key is to pick something you genuinely used and can describe in detail. Maybe it's a PDF guide that helped you set up your email list, or a free tool that saved you hours. Your review doesn't need to be long or fancy.
Just share what it is, why you stuck with it, and who it's for.
What Made You Finish It
Most free resources get abandoned. Explain what kept you going—was it the clear steps, the practical examples, or the fact that it solved a problem you had right then? That detail helps readers decide if it's worth their time too.
The Good And The Not-so-good
No resource is perfect. Mention one thing that could be better, like outdated screenshots or a section that felt rushed. Being honest makes your review more believable and useful.
Who Should Grab It
Be specific about who benefits most. A total beginner might love a simple checklist, while someone with experience might find it too basic. Telling readers who it's for saves them from wasting time.
7. Share a Mistake You Made in Your First Month

Nobody trusts a blogger who acts like they nailed everything on day one. Your first month was probably messy, and that is exactly why this post works. Pick one real mistake you made, own it, and walk readers through what you would do differently now.
The mistake can be small. Maybe you published ten posts in a week and burned out, or you picked a niche that bored you by week three. The point is not to confess everything.
The point is to show you learned something useful.
Readers love these posts because they get to skip the same stumble. You also get an easy writing win, since you already lived the story. Just keep it honest and specific instead of vague.
Pick The Mistake That Still Stings
Choose the one that cost you time, money, or confidence. A vague mistake like "I was inconsistent" lands flat. "I spent two weeks designing a logo nobody saw" gives readers something real to learn from.
Show The Fix, Not Just The Fail
Spend most of the post on what changed. Explain the new habit, tool, or rule you follow now. That turns a confession into a takeaway people can copy.
End With A Question
Ask readers what they got wrong in their first month. It invites comments, and those comments give you ideas for future posts.
8. Create a Simple Checklist for a Common Task
People love shortcuts. A simple checklist that helps someone finish a task faster is one of the easiest pieces of content you can create. Think about a routine thing your audience does often.
Maybe it's setting up a new email sequence, editing a blog post, or planning a week of social media. Turn that process into a step-by-step checklist. You don't need fancy design tools.
A Google Doc or a plain text list works fine. The goal is to make something people can copy, paste, and use right away.
Pick A Task You Already Know Well
Choose something you've done enough times that you can explain it without thinking too hard. The best checklists come from tasks you've already mastered. If you struggle to explain it, pick something simpler.
Keep It Short And Scannable
Aim for 5 to 10 steps. Use plain language and start each step with a verb. People should be able to skim it and still get the point.
If a step needs more explanation, add a quick note in parentheses.
Make It Easy To Save Or Share
Offer it as a downloadable PDF or a simple copy-paste block. You can also turn it into a graphic for Pinterest or Instagram. The easier it is to save, the more likely people will come back to it.
9. Compare Two Popular Options in Your Niche
Comparison posts perform well because they help readers make a decision. You do not need to be an expert on every tool or method. Just pick two options people already talk about and break down the differences in plain language.
Your goal is not to be neutral. Readers want a clear recommendation. Tell them which one you would choose and why, then let them decide for themselves.
This works for software, gear, strategies, courses, or even two different approaches to a common problem. If people argue about it in forums, it is fair game for a blog post.
Start by naming the two options clearly in your title. Something like "Tool A vs. Tool B: Which One Actually Works?
" gives readers a reason to click. In the post, give each option a fair shake. List the pros and cons without getting too technical.
Then share your pick based on real experience or research. Keep the comparison focused on what matters to your audience. Price, ease of use, and results usually matter more than feature lists nobody reads.
Pick A Fair Fight
Choose two options that people actually compare. If one is obviously better, the post writes itself and nobody cares. Look for tools or methods that spark debate in your niche.
Show The Real Differences
Skip the marketing fluff. Focus on three or four practical differences that affect daily use. Use screenshots, examples, or short stories to make it concrete.
Make Your Call
End with a clear recommendation. Say who should pick option A and who should pick option B. Readers trust you more when you take a side.
10. Write a Day-in-the-Life Post About Your Blogging Routine
Most blogging advice shows the highlight reel: a clean desk, a hot coffee, and three hours of uninterrupted writing. Your actual day probably looks nothing like that. That's exactly why a day-in-the-life post works.
Readers want to know how you fit blogging into real life. They want to see the messy middle. When you show your routine, you give them permission to build their own.
This post also doubles as a personal check-in. You'll notice what's working and what's quietly wasting your time.
Start by tracking one typical blogging day. Don't stage it. Just note when you sit down, how long you actually write, and what pulls you away.
Then write it up like a timeline. Morning coffee and outline, lunch break and editing, evening and scheduling social posts. Keep it honest.
If you wrote for 20 minutes between laundry loads, say so. The goal isn't to impress anyone. It's to show that consistency beats perfect conditions.
What Your Day Actually Looks Like
Break your day into blocks. When do you write? When do you research?
When do you promote? Include the interruptions. Kids, day jobs, and random errands are part of the story.
Readers relate to the chaos more than the calm.
The Tools And Habits That Keep You Moving
Mention the simple stuff. A notes app, a timer, a specific playlist. Nothing fancy.
Explain why each one helps. Maybe you write first thing because your brain is fresh. Maybe you batch posts on Sunday.
Share the habit, not just the tool.
What Gets In The Way (and How You Handle It)
Be upfront about your biggest time-waster. Social media? Perfectionism?
Research rabbit holes? Then say what you do about it. A two-minute rule, a distraction list, or just closing the browser tab.
Give readers one tactic they can steal.
11. Curate 7 Links You Saved This Week

You probably bookmarked a few articles or videos this week that you meant to revisit. Instead of letting them pile up, turn them into a blog post. Curating seven links is a simple way to share value without writing everything from scratch.
Your readers get a shortcut to good stuff, and you get a post that practically writes itself. Just add a sentence or two about why each link mattered to you. It's honest, helpful, and takes less time than a full how-to guide.
Here's how to make your link roundup feel personal and useful, not like a random dump of URLs.
Pick Links That Actually Helped You
Choose articles, videos, or posts you genuinely learned from or enjoyed. If it didn't teach you something or make you think, skip it. Your enthusiasm (or lack of it) will show.
Write A Quick Take For Each Link
For every link, add one or two sentences explaining what it's about and why you saved it. Maybe it solved a problem, changed your mind, or gave you a new idea. That tiny bit of context is what makes your roundup worth reading.
Keep The Format Simple And Scannable
Use a numbered list with the link title, a short description, and the URL. Bold the titles so readers can skim. No need for long paragraphs—just the good stuff.
12. Explain One Term Everyone in Your Niche Uses
Every niche has its own shorthand. New readers run into a word like "funnel, " "macro, " or "evergreen" and quietly wonder if they missed a memo. That confusion is an opportunity.
Write a plain-English breakdown of one term your audience keeps bumping into but rarely gets explained well. You do not need to be the expert who invented the word. You just need to be the person who finally makes it click.
Pick the term you see most often in comments, forums, and DMs. Then define it like you would to a friend over coffee, not like a textbook. Keep the post short.
One term, one clear explanation, a few real examples, and a quick note on why it matters. That is a complete, useful article. This also builds trust fast.
Readers remember who cleared things up for them, and they come back for the next term they are too shy to ask about.
Choose A Term People Actually Search
Skip the jargon only insiders care about. Look for words that show up in beginner questions, Facebook groups, or your own inbox. If you have gotten the same "what does this mean?
" question twice, that is your term.
Define It In One Plain Sentence
Give the simplest possible definition first, then expand. Something like "A funnel is just the path someone takes from discovering you to buying from you. " Simple beats clever every time.
Show It In Real Life
Add two or three quick examples from your niche so the definition sticks. A short story or screenshot-style scenario works better than a long theoretical explanation. End with why the term matters for the reader's next step.
13. Share Your Favorite Free Template or Worksheet
You already use a tool that saves you time, even if it's just a simple checklist. Sharing it with your readers gives them a quick win and shows you're not holding back the good stuff. This post works because it's low-effort for you and high-value for them.
Pick one template, worksheet, or swipe file you actually use. It doesn't need to be fancy. A Google Doc, a Notion page, or a printable PDF all work.
The key is that it solves a small, specific problem your audience has. Write a short post that explains what the template does, why you made or found it, and how to use it. Then give it away.
No email opt-in required unless you want one. The goodwill you build is worth more than the lead.
Templates make abstract advice concrete. Instead of telling someone to plan their week, you hand them a weekly planner. That's the difference between a forgettable post and one that gets bookmarked, shared, and revisited.
Your template doesn't have to be original. If you found a free budget spreadsheet that changed how you handle money, share it. Credit the source and add your own tips.
Readers trust recommendations more than sales pitches. The post itself should be short. A few paragraphs on the problem, a quick walkthrough of the template, and a link to download or copy it.
That's it. You're not writing a manual. You're handing someone a shortcut.
What To Include In The Post
Start with the problem your template solves. Maybe it's messy meal planning or tracking freelance invoices. Then show a screenshot or a short video of the template in action.
Finally, explain how to get it. Keep the instructions simple. If it takes more than three steps to access, you'll lose people.
How To Make It Easy To Share
Host your template on Google Drive, Dropbox, or Notion and set the link to view-only. That way anyone can copy it without requesting access. Add a short URL or a button in your post.
If you want email signups, use a simple form, but don't make it mandatory. Free and frictionless wins.
Why This Builds Trust Fast
When you give something away with no strings, people remember. They might not buy anything today, but they'll come back. A useful template positions you as someone who helps, not just someone who writes.
That's a strong foundation for the first 90 days.
14. Interview Someone Who Started Before You

Reaching out to someone a few steps ahead can give you a shortcut past common mistakes. You do not need a famous influencer—just someone who started their blog a few months or years before you. A simple Q&A turns their experience into a post your readers will actually thank you for.
The interview format works because it is easy to produce and packed with real value. You ask questions, they share lessons, and your audience gets honest advice without the fluff. Plus, your guest will likely share the post with their own audience, which helps you grow faster.
Pick The Right Person
Look for someone who is one or two steps ahead of you, not a mega-star. A fellow blogger in your niche who started six months ago will remember the struggles you are facing right now. Reach out with a short, friendly message explaining why you want to feature them.
Ask Questions That Get Real Answers
Skip the generic 'What advice do you have? ' Instead, ask about specific moments: their first failed post, how they got their first ten readers, or the tool they wish they had known about earlier. Specific questions lead to stories, and stories keep people reading.
Format It For Easy Reading
Use a simple Q&A style with bolded questions and short answers. Add a quick intro about who they are and why you asked them. If they have a blog or social profile, link to it—it is a nice thank-you and gives your readers a new resource.
Promote It As A Joint Effort
Once it is live, send the link to your guest and ask them to share it. Tag them when you post on social media. This doubles your reach and often leads to future collaborations or interviews.
15. Break Down a Popular Myth in Your Niche
Every niche has a few so-called rules that everyone repeats but nobody questions. Pick one of those and write a post that calmly explains why it's wrong or outdated. This works because people love a good myth-busting angle, and it positions you as someone who actually thinks instead of just copying what everyone else says.
The trick is to choose a myth that's common enough that your readers have heard it, but not so controversial that you start a war in the comments. You want a lightbulb moment, not a fight. Keep your tone friendly and back up your point with a real example, a quick stat, or a personal story.
The goal isn't to be right — it's to be helpful and clear.
Pick A Myth That Actually Matters
Look for a belief that affects how people spend time, money, or effort. Something like 'you need to post every day to grow' or 'long posts always rank better. ' If the myth doesn't change anyone's behavior, it's not worth writing about.
Show The Evidence Without Being Preachy
Share what you've seen work instead. A quick screenshot, a before-and-after, or a short story about your own experience does more than a lecture. Keep it simple and let the proof speak for itself.
Give Readers A Better Rule To Follow
Don't just tear down the myth — replace it with something practical. Tell them what to do instead and why it works. That way they leave with a clear next step, not just a bunch of questions.
16. Show How You Plan Your Week in 15 Minutes
Planning your week doesn't have to eat up your Sunday. You can map out seven days of content in about the time it takes to brew a pot of coffee. The trick is keeping it simple and repeatable, so you actually stick with it.
I use a 15-minute routine that covers idea capture, scheduling, and a quick sanity check. It works whether you blog about fitness, finance, or fountain pens. The goal isn't a perfect calendar—it's a clear path from Monday to Sunday.
Here's the exact process I follow every Friday afternoon. It keeps me from scrambling for ideas and helps me publish without the last-minute panic. First, I open a blank note and dump every half-formed thought from the week.
Then I slot the best ones into days. Finally, I trim anything that feels like a chore. That's it.
You can adapt this to any niche. The point is to make planning a habit, not a hurdle.
Brain Dump First, Organize Later
Spend five minutes writing down every topic that crossed your mind this week. Don't judge or edit—just get it out of your head and into a list. You'll usually end up with more ideas than you need, which is a good problem to have.
Assign One Idea Per Day
Look at your list and pick the seven that feel easiest to write. Assign each one to a specific day, Monday through Sunday. If a day looks too busy, swap in a lighter idea.
Consistency beats complexity.
Do A Two-minute Gut Check
Scan your week and ask: can I realistically write these? If any post makes you groan, replace it with something simpler. Your future self will thank you for not overcommitting.
17. List 5 Things You Wish You Knew Before Starting

Think back to day one. What would you tell yourself if you could send a note back in time? That's the post.
It's honest, relatable, and exactly what someone in their first week needs to hear. You don't need to be an expert. You just need 90 days of hindsight.
Write it like you're talking to a friend who just hit publish for the first time. Keep it real, keep it short, and don't sugarcoat the messy parts.
Here are five things most new bloggers wish they'd known sooner. Use these as prompts or swap in your own lessons. The goal is to save someone else a few headaches. **1.
Your first posts won't be your best. And that's fine. Nobody expects perfection on day one. The sooner you accept that, the faster you'll hit publish. 2.
Consistency beats intensity. One post a week for three months beats ten posts in one weekend followed by silence. Show up regularly, even when it's not fancy. 3. Nobody cares about your niche as much as you do. ** That's not a bad thing.
It means you get to teach, explain, and share without worrying about impressing other experts. 4. You'll change your mind a lot. Your topics, your style, your goals. That's normal.
Give yourself permission to evolve without starting over. 5. Small wins count. First comment, first share, first subscriber. Celebrate them.
They're proof you're moving forward.
Make It Personal
Share a quick story for each point. Maybe you spent hours on a post nobody read, or you almost quit in week two. Specific moments make the advice stick.
Keep It Actionable
End each item with one small step. For example: 'Pick one post from last month and update it instead of writing a new one. ' Give readers something to do right away.
Invite Them To Share
Ask readers what they wish they'd known. A simple question at the end can spark comments and make the post feel like a conversation, not a lecture.
18. Review a Book That Changed How You Work
Books have a way of shifting how we approach our daily tasks. When you share a review of one that made a real difference, you give your readers a shortcut to something useful. The key is to focus on one practical takeaway you actually applied, not a full summary of the book.
This kind of post works because it's personal and actionable. You're not just talking about a book; you're showing how it changed your workflow. That makes it relatable and easy for others to try.
Plus, it's a breeze to write. You already know the book and the lesson, so you can knock this out in one sitting.
Pick A Book With A Clear Lesson
Choose a book that taught you something you now use regularly. It could be about productivity, creativity, marketing, or even mindset. The best picks are those where you can point to a specific change you made.
Avoid books that are too broad or theoretical. You want something that gave you a concrete tool or habit. That way, your review stays focused and helpful.
Share The One Thing You Tried
Don't recap the whole book. Instead, zero in on the single most impactful idea you put into practice. Explain what it was and how you applied it in your work.
Be specific. For example, if the book suggested time-blocking, describe how you set aside two hours each morning for deep work. Show the before and after so readers see the benefit.
Explain The Result (and Any Tweaks)
Tell readers what happened after you made the change. Did it save you time, reduce stress, or improve your output? Be honest about what worked and what didn't.
If you had to adjust the advice to fit your situation, mention that. It makes your review more authentic and helps readers adapt the idea to their own lives.
19. Create a 'Start Here' Page for New Readers
When someone lands on your blog for the first time, they shouldn't have to guess where to begin. A 'Start Here' page solves that by giving them a clear path to your best stuff. It's like a welcome mat that also works as a map.
This page doesn't need to be fancy. It just needs to tell people what your blog is about and point them to the posts that matter most. Think of it as your blog's handshake—friendly, direct, and helpful.
What To Include
Start with a short intro that explains who you are and what readers can expect. Then list 3-5 of your best posts with a sentence about why each one is worth reading. Add a call to action, like subscribing to your newsletter or following you on social media.
Keep It Simple
Don't overload the page with every post you've ever written. Pick your strongest content and link to it. Use clear headings and bullet points so it's easy to scan.
A clean, simple page is more inviting than a cluttered one.
Make It Easy To Find
Add a link to your 'Start Here' page in your main navigation menu. You can also link to it from your About page and in your welcome email. The goal is to make sure new readers can't miss it.
20. Share Your 90-Day Blogging Results (Even If They Are Small)

Ninety days in, your numbers probably will not impress anyone. That is fine. What matters is that you have real data now, and sharing it builds trust with the people who have been reading along.
A results post works because it is honest. You show what happened, what flopped, and what you plan to try next. Readers love that more than another polished how-to.
You also get a useful record for yourself. Six months from now, you will want to know where you actually started.
Show The Numbers, Not Just The Wins
List your traffic, subscribers, and top posts for the quarter. If you only got 200 pageviews, say that. Small numbers make the story relatable.
Screenshots from your analytics dashboard work well here. They prove you are not making things up.
Call Out What Actually Worked
Pick two or three things that moved the needle. Maybe one post got shared a lot, or a specific topic brought in steady readers. Explain why you think it worked.
That reasoning is the useful part for anyone reading.
Be Honest About What Flopped
Name the posts that got almost no traffic and the tactics that wasted your time. This is the section people remember. You do not need to be dramatic about it.
Just say what you tried and what you learned.
Say What Comes Next
Close with three specific things you will do differently in the next 90 days. Keep them small and measurable. Invite readers to follow along or share their own results.
That turns a recap into a conversation.
FAQ
How often should I publish in my first 90 days?
Aim for once a week if you can. Consistency matters more than frequency, so pick a pace you can keep without burning out.
Do I need to spend money on tools to start?
No. Free tools like Google Docs, Canva, and a basic WordPress or Substack account are enough for your first 90 days.
What if I run out of ideas after this list?
Revisit your top-performing posts and expand them. Also, check comments and questions from readers for new angles.
Should I write for search engines or for people?
Write for people first. If your post answers a real question clearly, search engines will eventually catch up.
How do I know if my blog is working?
Look for small signals: comments, shares, email replies, or a few returning visitors. Early traction is rarely huge, so celebrate the tiny wins.
Conclusion
You don't need all twenty ideas live by Friday. Pick three that feel doable this week, write them, and hit publish before you polish anything. Your first ninety days are for figuring out what sticks, not chasing perfection.
Watch which posts get replies, shares, or quiet repeat visits. That tells you what to double down on next month. Keep the list handy, swap ideas in and out, and let your blog grow at a pace you can actually maintain.
Free PDF Download
Not Sure Which Side Hustle Fits You Best?
Take the free Side Hustle Matchmaker Quiz and get a simple 7-day starter plan to help you choose a beginner-friendly idea based on your time, skills, comfort level, and goals.
You’ll get this free PDF plus access to the full Marketerna Save More & Earn More PDF Kit. No spam. Unsubscribe anytime.