19 Frugal Home Organization Ideas
You don't need expensive bins or fancy shelving to get your home organized. With a little creativity and items you already have, you can tackle clutter without spending much. These 19 frugal ideas prove that smart storage doesn't have to cost a fortune.
From repurposing shoeboxes into drawer dividers to turning a cookie sheet into a command center, each tip is simple and budget-friendly. You'll find clever ways to use mason jars, binder clips, and even egg cartons to tame chaos around the house.
Best of all, these solutions are easy to implement and actually work. Pick a few that fit your space, and enjoy a more organized home without the hefty price tag.

Free PDF Download
Not Sure Which Side Hustle Fits You Best?
Take the free Side Hustle Matchmaker Quiz and get a simple 7-day starter plan to help you choose a beginner-friendly idea based on your time, skills, comfort level, and goals.
You’ll get this free PDF plus access to the full Marketerna Save More & Earn More PDF Kit. No spam. Unsubscribe anytime.
1. Use Shoeboxes as Drawer Dividers
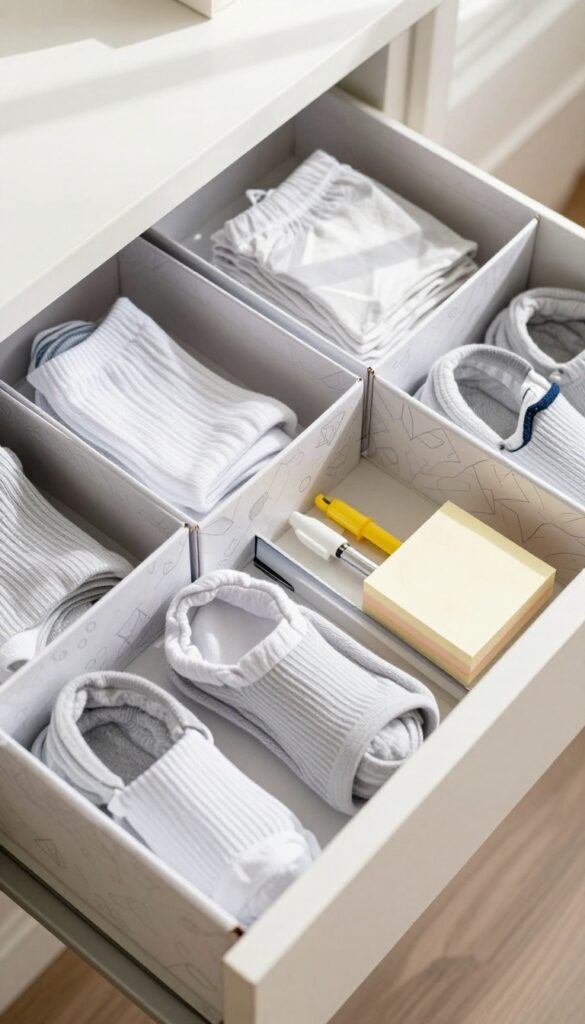
Shoeboxes are one of those items that pile up fast, but instead of tossing them, put them to work. They're the perfect size for organizing drawers, and best of all, they cost you nothing. With a little trimming and a coat of paper, you can turn them into custom dividers that look like you bought them.
Start by collecting a few shoeboxes of similar size. Measure your drawer and cut the boxes down so they fit snugly side by side. If you want a uniform look, cover each box with wrapping paper or contact paper.
Arrange them in the drawer to create separate compartments for socks, underwear, office supplies, or kitchen utensils. The boxes keep everything separated and easy to grab.
Cut To Fit
Not every shoebox will match your drawer dimensions. Use a utility knife or strong scissors to trim the height or width. For deeper drawers, you can stack two boxes or keep them single layer.
The goal is a snug fit so nothing slides around.
Cover For Style
Plain cardboard works fine, but if you want a polished look, cover the boxes with wrapping paper, scrapbook paper, or even fabric. Use spray adhesive or double-sided tape. This step takes just a few minutes and makes your drawer look custom.
Mix And Match
You don't have to use only shoeboxes. Combine them with other small boxes like tissue boxes or gift boxes for varied compartment sizes. The mix keeps your drawer organized for different items, from batteries to spice packets.
2. Repurpose Mason Jars for Pantry Storage
Mason jars are a classic frugal organizing tool, and for good reason. They're cheap, durable, and look great on shelves. Instead of buying expensive canisters, grab a few jars from your next pasta sauce purchase or hit up a thrift store for a mixed batch.
You'll instantly upgrade your pantry without spending much.
Start by sorting your dry goods—pasta, rice, beans, snacks—and decant them into clean mason jars. The airtight seal keeps food fresh longer, and seeing everything at a glance makes meal prep easier. Plus, uniform jars create a tidy, cohesive look that feels instantly more organized.
Choose The Right Size
Not all mason jars are the same. Use wide-mouth quart jars for bulky items like pasta or flour, and smaller pint jars for spices, nuts, or dried fruit. Keep a few tiny jelly jars for odds and ends like baking soda or loose tea.
Label Like A Pro
Grab a chalk marker or some adhesive labels and write the contents and date on each jar. Chalk labels are reusable—just wipe off and rewrite when you refill. This simple step saves time digging through the pantry and helps you track freshness.
Stack And Store Smart
If your pantry has deep shelves, use a tiered riser or simple wooden crate to create levels. Stack jars no more than two high to avoid tipping. For shallow cabinets, store jars on their sides in a wire basket—just make sure lids are tight.
Free PDF Download
Not Sure Which Side Hustle Fits You Best?
Take the free Side Hustle Matchmaker Quiz and get a simple 7-day starter plan to help you choose a beginner-friendly idea based on your time, skills, comfort level, and goals.
You’ll get this free PDF plus access to the full Marketerna Save More & Earn More PDF Kit. No spam. Unsubscribe anytime.
3. Hang a Tension Rod Under the Sink
That dark, awkward space under your sink is prime real estate for storage. Instead of letting bottles and cleaners pile up in a messy heap, grab a tension rod. It's a simple trick that instantly creates vertical storage for spray bottles, freeing up the floor for bigger items.
A tension rod costs just a few dollars and installs in seconds—no tools required. Measure the width of your cabinet, adjust the rod to fit snugly, and hang spray bottles by their triggers. This keeps them off the bottom of the cabinet, making them easy to grab and preventing leaks from soaking your supplies.
Plus, you can still store trash bags, sponges, or a small step stool underneath.
What You'll Need
All you need is a tension rod that fits your cabinet width (most standard rods work), and spray bottles with trigger handles. That's it. No drilling, no adhesive, no permanent changes.
Pro Tips For Best Results
Position the rod close to the cabinet door so bottles hang forward and don't bump into pipes. If your bottles are heavy, choose a sturdy rod with strong spring tension. For extra stability, add a second rod for a double row of bottles.
Bonus Uses
This trick isn't just for spray cleaners. Hang dish gloves, scrub brushes (with holes in the handle), or even small bags of chips or snacks if you use the rod in a pantry. Versatile and cheap!
4. Turn a Magazine Rack into a Plastic Bag Holder
Plastic grocery bags have a way of multiplying under the sink or in a kitchen drawer. Instead of letting them take over, give them a designated home using a magazine rack. It's a simple swap that keeps bags contained and easy to grab when you need one.
A magazine rack is perfect for this because its open design lets you stuff bags in and pull them out without fuss. Mount it on the inside of a cabinet door or set it on a shelf. You can even use a wire or wooden rack for a nicer look.
Where To Place It
Hang the rack inside a pantry door, under the sink, or in a laundry room. If you don't want to drill, a small rack can sit on a shelf or counter. Just make sure it's easy to reach when you're unloading groceries.
How To Load It
Fold each bag flat and stack them in the rack like magazines. Or just stuff them in loosely—either way works. For extra neatness, fold bags into triangles before adding them.
Bonus Tips
Use a rack with a handle or one that's wall-mounted to save counter space. If you have a lot of bags, use two racks side by side. This trick also works for reusable shopping bags or produce bags.
Free PDF Download
Not Sure Which Side Hustle Fits You Best?
Take the free Side Hustle Matchmaker Quiz and get a simple 7-day starter plan to help you choose a beginner-friendly idea based on your time, skills, comfort level, and goals.
You’ll get this free PDF plus access to the full Marketerna Save More & Earn More PDF Kit. No spam. Unsubscribe anytime.
5. Use Binder Clips to Manage Cords
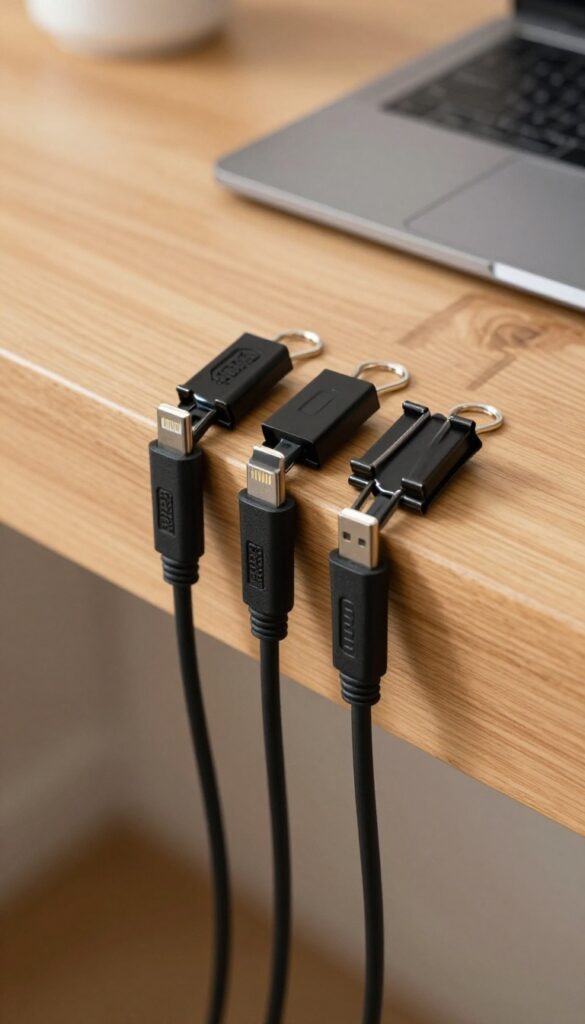
Tangled cords are a universal annoyance, but you don't need fancy cable management gear. A pack of binder clips costs a couple of dollars and can work wonders. Clip them to the edge of your desk or nightstand, then thread each charging cable through the metal handles.
This simple trick keeps cords off the floor and within easy reach.
Binder clips are surprisingly versatile for cord control. They're cheap, reusable, and work on any flat surface. You can even label each clip with a marker to know which cord belongs to which device.
No more digging behind furniture for a lost charger.
Desk Setup
Clip a few binder clips along the back edge of your desk. Run your laptop charger, phone cable, and tablet cord through separate clips. This prevents them from sliding off and keeps your workspace tidy.
Nightstand Solution
Attach a binder clip to the side of your nightstand to hold your phone charger. When you're done, just unplug and leave the cable hanging neatly. No more tangled mess on your bedside table.
Kitchen Counter Hack
Use a binder clip on the edge of your kitchen counter to manage the cord of your coffee maker or toaster. It keeps the cord from dangling into the sink or getting caught on other appliances.
6. Create a Command Center with a Cookie Sheet
A metal cookie sheet isn't just for baking—it can become the backbone of your family's command center. Mount it on a wall or inside a cabinet door, and you instantly have a magnetic board for notes, reminders, and photos. Paint it or cover it with fabric to match your decor, and you've got a custom organizer for next to nothing.
Start with a standard cookie sheet (any size works). Clean it thoroughly, then spray paint it in a color that fits your space, or wrap it with adhesive fabric or contact paper. Attach it to the wall using strong adhesive strips or screws (if you're okay with permanent mounting).
Once it's up, use magnets to hold papers, to-do lists, and even lightweight supplies like binder clips or small scissors. Add a few magnetic hooks for keys or a small pouch for pens. This setup keeps daily clutter off counters and gives everyone a central spot to check.
Choose The Right Cookie Sheet
Look for a sheet with a lip—it'll hold magnets better and prevent items from sliding off. Avoid non-stick or coated sheets if you plan to paint, as the paint may not adhere well. Dollar stores often have cheap metal sheets perfect for this project.
Customize Your Command Center
Spray paint the sheet in a bold color for a pop of personality, or cover it with fabric using spray adhesive. You can also add a thin layer of chalkboard paint over the metal for a dual-purpose board that works with both magnets and chalk.
Mount It Securely
For renters, use heavy-duty command strips rated for the weight of the sheet plus magnets. For a permanent solution, drill small screws into wall studs. If mounting inside a cabinet door, use short screws that won't poke through the other side.
7. Store Lids in a Paper Towel Holder
Pot lids are notorious for clattering around in cabinets and taking up valuable space. A simple vertical paper towel holder can solve this problem for pennies. Just slide your lids onto the rod, and they'll stand upright, making it easy to grab the one you need without digging through a pile.
This trick works for cutting boards and baking sheets too.
A vertical paper towel holder is a cheap and effective way to store pot lids, cutting boards, or baking sheets. It keeps them upright and easy to access, freeing up cabinet space and reducing clutter.
Choose The Right Holder
Look for a paper towel holder with a sturdy base and a tall rod. A spring-loaded or weighted base works best to prevent tipping. You can find these at thrift stores or dollar stores for a couple of dollars.
How To Arrange Lids
Stack lids by size, with the largest at the bottom. Slide them onto the rod so they stand vertically. For smaller lids, you can place them between larger ones to keep them secure.
This method works for metal, glass, and plastic lids alike.
Other Uses
The same holder can organize cutting boards, baking sheets, or even muffin tins. Just slide them on vertically, and you'll have a tidy, accessible storage solution. For extra stability, place the holder in a deep drawer or on a shelf.
8. Use Egg Cartons for Small Hardware
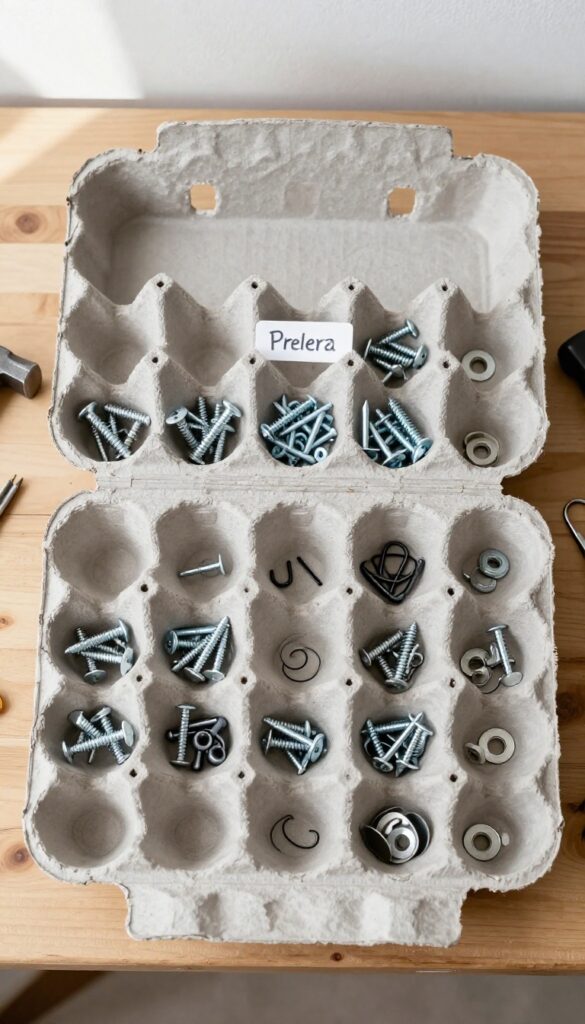
Egg cartons are one of those items that seem destined for the trash, but they make surprisingly good organizers for tiny things. Their built-in compartments are perfect for sorting screws, nails, washers, and other small hardware that tends to get lost in drawers. Plus, they're free and easy to replace.
Instead of buying a pricey organizer with tiny bins, grab an empty egg carton. The individual cups keep each type of hardware separate, so you can find what you need quickly. They fit neatly in toolboxes, junk drawers, or workshop shelves.
Sort By Size Or Type
Use one carton for screws of different lengths, another for nails, and a third for small parts like hooks or eyelets. Label each cup with a marker or sticky note if you want to get really organized. The cardboard is easy to write on.
Stack And Store
Egg cartons stack well, so you can create a mini filing system for your hardware. Place them in a shallow drawer or on a shelf. When one gets worn out, just swap in a fresh one.
It's a low-maintenance system that costs nothing.
Take It On The Go
Need to bring hardware to a project site? An egg carton keeps everything contained and prevents spills. Close the lid and toss it in your bag.
It's lightweight and disposable, so you don't have to worry about losing it.
9. Hang a Shoe Organizer on the Back of a Door
That over-the-door shoe organizer you're not using? It's a hidden storage goldmine. Instead of letting it collect dust, hang it on a closet, pantry, or bathroom door to stash all sorts of odds and ends.
You'll be surprised how much clutter it can swallow up.
Shoe organizers are cheap, lightweight, and have tons of pockets. They turn unused vertical space into instant storage. Best of all, you can see everything at a glance, so you won't lose small items.
Cleaning Supplies Caddy
Hang one in the laundry room or under the sink. Each pocket can hold a spray bottle, scrub brush, or microfiber cloth. No more digging through a jumbled bucket.
Grab what you need and go.
Bathroom Toiletries Organizer
Stick one on the back of the bathroom door. Use the pockets for extra shampoo, lotions, razors, and hair tools. It keeps the counter clear and makes morning routines faster.
Craft And Office Supplies
In a craft room or home office, a shoe organizer holds markers, scissors, glue sticks, and washi tape. Each pocket can hold a different category. No more rummaging through drawers for that one specific pen.
10. Repurpose Cereal Boxes as Magazine Files
Cereal boxes are one of those items that pile up fast, but they're also surprisingly sturdy and the perfect size for holding magazines, notebooks, or mail. Instead of tossing them in the recycling bin, you can turn them into free magazine files that look just as good as store-bought ones. All you need is a pair of scissors, some wrapping paper or scrapbook paper, and a few minutes of your time.
Cut the top of a cereal box at an angle, like a traditional magazine file, and cover it with paper or fabric. The result is a durable, custom-looking organizer that costs nothing. Use them to corral magazines, kids' artwork, bills, or even tablet devices.
They stack neatly on shelves and are easy to label.
How To Make Them
Start by cutting off the top flaps of an empty cereal box. Then, using a ruler and a pencil, mark a diagonal line from the top corner down to the opposite side, about halfway down the box. Cut along that line to create the angled opening.
Cover the box with decorative paper using glue or double-sided tape, folding the edges inside for a clean finish.
Ways To Use Them
These homemade files aren't just for magazines. Use them to store cookbooks, coloring books, or even as a mail sorter on your desk. You can also group several together on a shelf to create a cohesive storage system.
Label each one with a sticker or a piece of washi tape for easy identification.
Customize For Your Decor
Match the paper to your room's color scheme or use wrapping paper left over from gifts. For a more durable finish, laminate the boxes or cover them with fabric using spray adhesive. You can also paint them with chalkboard paint for a reusable label surface.
11. Use a Lazy Susan for Cabinet Organization
A lazy Susan isn't just for the dining table—it's a game-changer in your cabinets. That spinning tray lets you reach everything without digging or pulling items out. It's perfect for deep cabinets where stuff gets lost in the back.
You can find lazy Susans at thrift stores or dollar stores for a couple of bucks. Place one in a kitchen cabinet for spices, canned goods, or condiments. In a bathroom cabinet, it keeps toiletries tidy and accessible.
Even a small lazy Susan in the pantry makes grabbing snacks a breeze.
Where To Use A Lazy Susan
Spice cabinets are the most obvious spot, but don't stop there. Use one under the sink for cleaning supplies, in a corner cabinet for pots and pans, or in the fridge for condiments and jars. Any deep or awkward space benefits from a spin.
Choosing The Right Size
Measure your cabinet before buying. A standard 10-inch lazy Susan fits most shelves, but you can go larger for bigger cabinets. Look for one with a non-slip surface or add a shelf liner to keep items from sliding.
Diy Lazy Susan Options
If you're handy, make your own with a wooden round and a turntable bearing from a hardware store. Or repurpose an old cake stand or turntable from a microwave. Even a sturdy paper plate or plastic lid can work in a pinch.
12. Label Everything with Painter's Tape
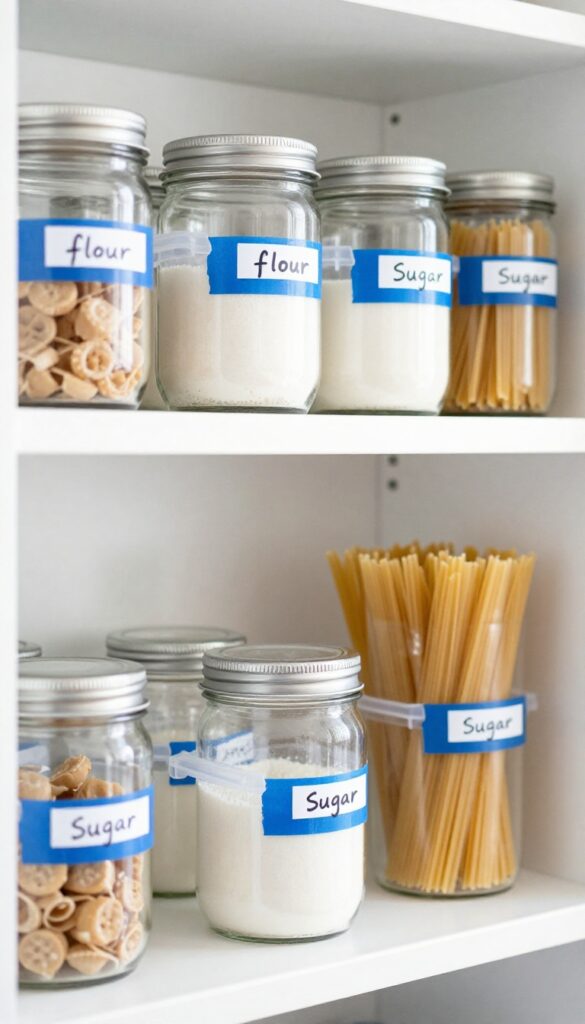
Labels are the unsung heroes of organization. They tell you exactly where things go and help everyone in the house put items back in the right spot. But fancy label makers and adhesive labels can get pricey.
Painter's tape and a permanent marker give you the same result for pennies. Plus, they peel off cleanly when you want to change things up.
Grab a roll of blue painter's tape and a black Sharpie. Write the name of the contents on a strip of tape and stick it to the bin, shelf, or container. That's it.
You now have a customizable labeling system that costs almost nothing.
Why Painter's Tape Works Best
Painter's tape is designed to be removed without leaving sticky residue or damaging surfaces. That makes it perfect for temporary or evolving organization systems. Unlike regular masking tape, it won't yellow or become brittle over time.
And it comes in a few widths, so you can choose a size that fits your containers.
Where to Use It
Label storage bins in the garage or attic so you know what's inside without digging. Mark shelves in the pantry to keep similar items grouped together. Put labels on jars and canisters in the kitchen to remember what's flour and what's sugar.
You can even label cords and cables to avoid confusion.
Tips For A Clean Look
Write neatly or use a stencil for a more polished appearance. Cut the tape into uniform strips with scissors for consistency. If you want a more permanent solution, cover the tape with clear packing tape to protect the writing.
When you need to relabel, just peel and replace.
13. Store Jewelry in an Ice Cube Tray
Ice cube trays aren't just for making ice. Their small compartments are ideal for keeping earrings, rings, and other tiny accessories separated and tangle-free. Best of all, they cost nothing if you already have an unused tray in your kitchen.
Drop a pair of earrings into each slot, lay rings flat, and close the drawer. No more digging through a jumbled jewelry box. You can even dedicate one tray to earrings and another to rings or small pendants.
Perfect For Drawer Storage
Most ice cube trays are about the width of a standard drawer, so they slide right in. Use one tray per jewelry category, or stack two trays on top of each other if your drawer is deep enough.
Sort By Type Or Color
Assign each row to a different jewelry type—studs in row one, hoops in row two, rings in row three. Or go by color to make matching outfits even faster. The clear plastic lets you see everything at a glance.
Bonus: Travel Case Hack
Pack an ice cube tray in your suitcase to keep necklaces from tangling and earrings from getting lost. Just cover with a rubber band or wrap in a soft cloth to keep items secure during transit.
14. Use a Hanging Shower Caddy for Bathroom Storage
A hanging shower caddy isn't just for the shower. It's a versatile organizer that can hold toiletries, hair tools, or even cleaning supplies. Hang it over the showerhead or on a hook to free up counter and cabinet space.
It's a low-cost solution that works in any bathroom.
Shower caddies are cheap and easy to find. They come in wire, plastic, or mesh designs. Pick one that fits your space and needs.
Use it to store daily essentials like shampoo, conditioner, and body wash. Or repurpose it for other items like makeup brushes, razors, or small bottles.
Maximize Vertical Space
Hang the caddy on the shower arm or a suction hook. This keeps items off the tub edge and out of the way. It's perfect for small bathrooms where counter space is limited.
Dual-purpose Storage
Use one caddy for toiletries and another for cleaning supplies. Keep a caddy under the sink with sponges, spray bottles, and scrub brushes. Grab it when you need to clean the bathroom.
Organize Hair Tools
Hang a caddy near your mirror to hold a hair dryer, straightener, and brushes. It keeps cords from tangling and tools within easy reach. Just make sure the caddy is heat-resistant.
15. Repurpose Wine Corks as Plant Markers
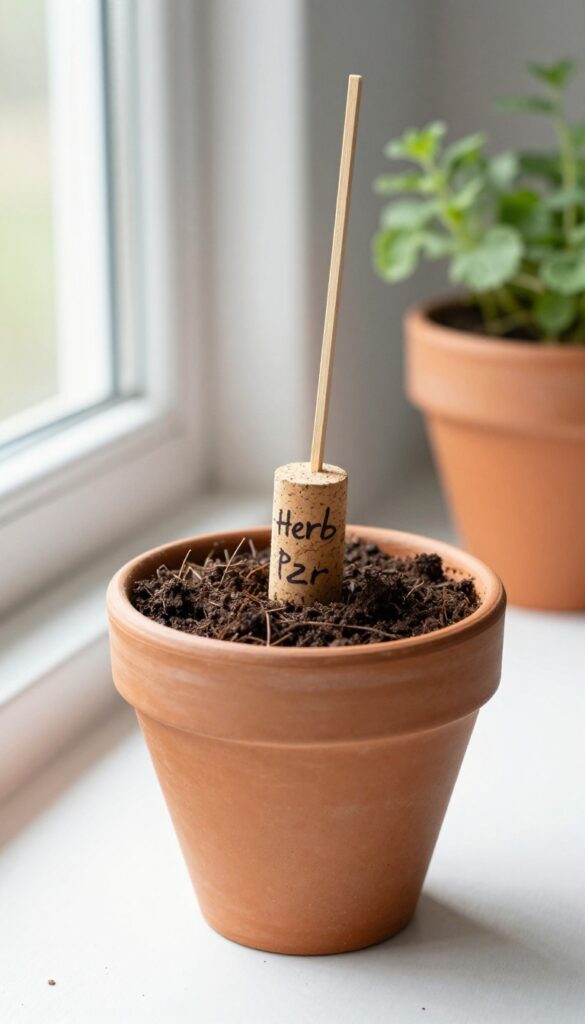
If you enjoy a glass of wine now and then, you've probably got a stash of corks lying around. Instead of tossing them, put them to work in your indoor herb garden. Wine corks make charming, functional plant markers that add a rustic touch to your pots.
Plus, they're free and surprisingly durable.
Here's how to turn corks into plant markers and keep your herbs labeled in style.
How To Make Them
Simply write the name of each herb on a wine cork using a permanent marker or a paint pen. Then, push a wooden skewer or a toothpick into the bottom of the cork to create a stem. Stick the other end into the soil of the corresponding pot.
That's it—you've got cute, readable markers that won't fade or blow away.
Why They Work So Well
Corks are naturally water-resistant, so they hold up well in moist potting soil. They're also thick enough to write on clearly, and the neutral color blends nicely with any planter. Unlike plastic tags, they won't look out of place in a cozy kitchen or on a windowsill.
Extra Tips
For a more polished look, seal the writing with a thin layer of Mod Podge or clear nail polish. You can also glue a small magnet to the back of a cork and stick it on a metal tray for a vertical herb garden. And if you don't have skewers, just use a short twig from the yard.
16. Use a Pill Organizer for Small Items
Weekly pill organizers are surprisingly handy for corralling tiny odds and ends. Their small compartments are perfect for keeping earrings, beads, sewing supplies, or even hardware like screws and nails sorted by day or type. It's a cheap, compact solution that turns a daily necessity into a clever storage tool.
Pill organizers are built to separate small items into daily doses, but they work just as well for non-medical uses. The clear lids make it easy to see what's inside, and the compact size fits neatly in drawers or craft bins. Plus, you can often find them at dollar stores or thrift shops for next to nothing.
Jewelry Sorting
Use a 7-day organizer to separate earrings by pair or type. No more untangling chains or hunting for a missing stud. The compartments keep each day's accessories ready to grab.
Craft And Sewing Kits
Store beads, buttons, needles, or thread spools in separate compartments. A pill organizer makes a portable sewing kit that fits in your purse. Just label the days or use a permanent marker to note contents.
Hardware And Small Parts
Keep screws, nails, or picture hangers sorted by size. Perfect for quick repairs without digging through a messy toolbox. The organizer slides easily into a junk drawer or tool chest.
17. Create a Charging Station with a Box
Tangled charging cords and devices scattered around the house can make any room feel messy. A simple decorative box can solve that problem and keep everything in one tidy spot. Best of all, you probably have a box lying around that’s perfect for the job.
Grab a sturdy box with a lid—like a shoebox, gift box, or even a small wooden crate. Cut a few slots in the lid or sides to feed charging cables through, then place the box near an outlet. Plug in your devices and close the lid to hide the mess.
You can paint or wrap the box to match your decor.
Choosing The Right Box
Look for a box that’s wide and deep enough to hold your phone and tablet at the same time. A lid is key for hiding cords, but you can also use a box without a lid and just tuck cables inside. Cardboard works fine, but a wooden or metal box adds durability.
Cutting The Slots
Use a craft knife or scissors to cut narrow slots in the lid or back of the box. Make them just wide enough for the charging plug to pass through. If you want to charge multiple devices, cut a few slots spaced a couple inches apart.
Sand the edges if needed to avoid fraying cables.
Bonus Tips For Cord Management
Label each slot with a small sticker so you know which cord belongs to which device. You can also use a binder clip to hold the cable in place near the slot. For a cleaner look, wrap excess cord length with a twist tie or velcro strap inside the box.
18. Use a Tension Rod in a Closet for Scarves
Scarves, belts, and ties have a way of turning into a tangled mess in drawers or on hooks. A small tension rod can solve that without drilling holes or spending much. Just wedge it between two walls in your closet, and you have an instant hanging organizer.
Install a small tension rod in a closet to hang scarves, belts, or ties. It keeps them wrinkle-free and visible.
How To Choose The Right Rod
Measure the space between your closet walls first. Tension rods come in various sizes, so pick one that fits snugly. A rod with rubber ends grips better and won't slip.
For lightweight items like scarves, a basic shower tension rod works perfectly.
What To Hang
Scarves are obvious, but don't stop there. Belts, ties, bandanas, and even lightweight bags can hang neatly. Fold each item over the rod so it hangs freely.
This method also works for jewelry like long necklaces or chains.
Placement Tips
Install the rod in an unused corner of your closet, or above a row of hanging clothes. Make sure it's at a height where you can easily reach items. If you have multiple scarves, use two rods stacked vertically for double the space.
19. Repurpose a Ladder as a Towel Rack
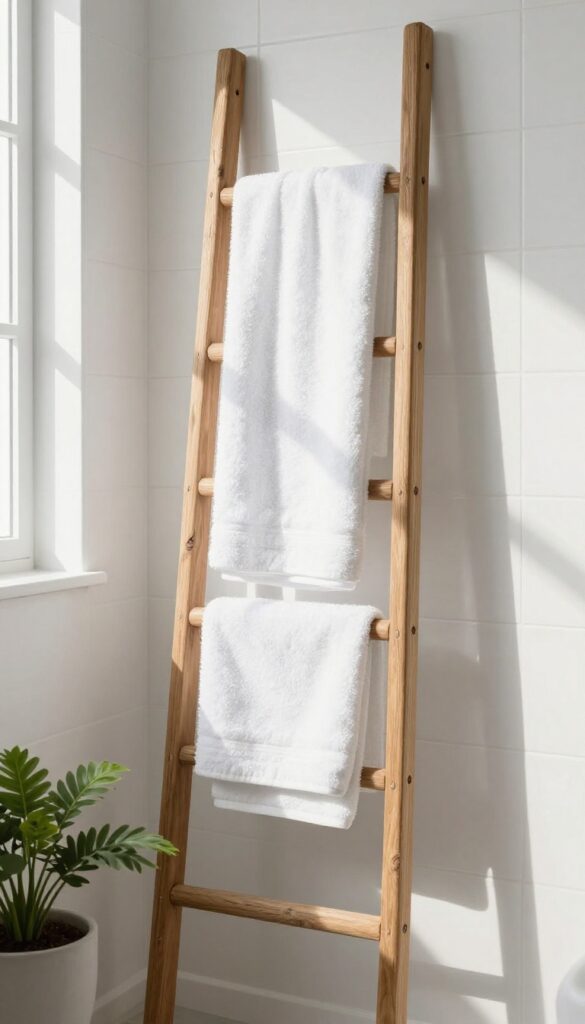
An old wooden ladder leaned against the wall makes a rustic towel rack. Hang towels over the rungs for a spa-like feel. It's a clever way to add storage and character to your bathroom or laundry room without spending a dime on a new fixture.
This idea works best with a sturdy wooden ladder. You can use one you already have, find one at a thrift store, or even build a simple one from scrap wood. The ladder can be leaned against the wall or mounted horizontally for a more permanent look.
The rungs provide perfect spots for hanging towels, robes, or even baskets for extra storage.
Choosing The Right Ladder
Look for a ladder that's tall enough to reach your desired height but not so wide that it overwhelms the space. A standard 6-foot step ladder works well for most bathrooms. Sand it down if needed and apply a coat of paint or stain to match your decor.
Styling And Placement
Lean the ladder against a wall in a corner or beside the tub. Drape towels over the rungs in a cascading pattern. You can also add small hooks to the sides for hanging washcloths or loofahs.
For a cohesive look, roll towels and stack them on the rungs instead of just hanging them.
Alternative Uses
This ladder rack isn't just for towels. Use it in the entryway for coats and scarves, in the kitchen for dish towels and aprons, or in the bedroom for blankets and throws. The possibilities are endless.
FAQ
What are the best frugal home organization ideas?
The best frugal ideas use items you already have, like shoeboxes, mason jars, and tension rods. They cost little to nothing and solve common clutter problems.
How can I organize my home without buying anything?
Repurpose everyday items like egg cartons, cereal boxes, and wine corks. Use painter's tape for labels and binder clips for cord management.
What is the cheapest way to organize a pantry?
Use mason jars for dry goods and repurpose cereal boxes as magazine files. A lazy Susan can help you reach items in the back without buying new shelves.
How do I organize small spaces on a budget?
Use vertical space with tension rods and over-the-door organizers. Repurpose items like shoe organizers and shower caddies to maximize storage.
Can I organize my closet without spending money?
Yes. Use shoeboxes as dividers, hang a tension rod for scarves, and repurpose a ladder as a towel rack. These ideas cost nothing and work well.
Conclusion
Getting your home organized doesn't require expensive bins or fancy systems. These 19 frugal ideas prove that a little creativity and everyday items can transform your space.
Pick one or two that fit your current clutter challenge and give them a try. You'll be amazed at how much you can accomplish without spending a dime.
Free PDF Download
Not Sure Which Side Hustle Fits You Best?
Take the free Side Hustle Matchmaker Quiz and get a simple 7-day starter plan to help you choose a beginner-friendly idea based on your time, skills, comfort level, and goals.
You’ll get this free PDF plus access to the full Marketerna Save More & Earn More PDF Kit. No spam. Unsubscribe anytime.