12 Useful Blogging Tools Beginners Should Try First
You hit publish, and suddenly your blog looks like a real website. That feeling comes faster when you start with the right tools. The wrong ones waste weeks and drain your motivation.
The right ones make writing, publishing, and growing feel almost easy.
This list covers 12 blogging tools beginners should try first. Each one solves a specific problem you'll face in your first few months. No bloated software.
No steep learning curves. Just practical picks that help you get posts live and readers coming back. Try them in order or jump to what you need most.

Free PDF Download
Not Sure Which Side Hustle Fits You Best?
Take the free Side Hustle Matchmaker Quiz and get a simple 7-day starter plan to help you choose a beginner-friendly idea based on your time, skills, comfort level, and goals.
You’ll get this free PDF plus access to the full Marketerna Save More & Earn More PDF Kit. No spam. Unsubscribe anytime.
1. WordPress: Your Blog's Home Base
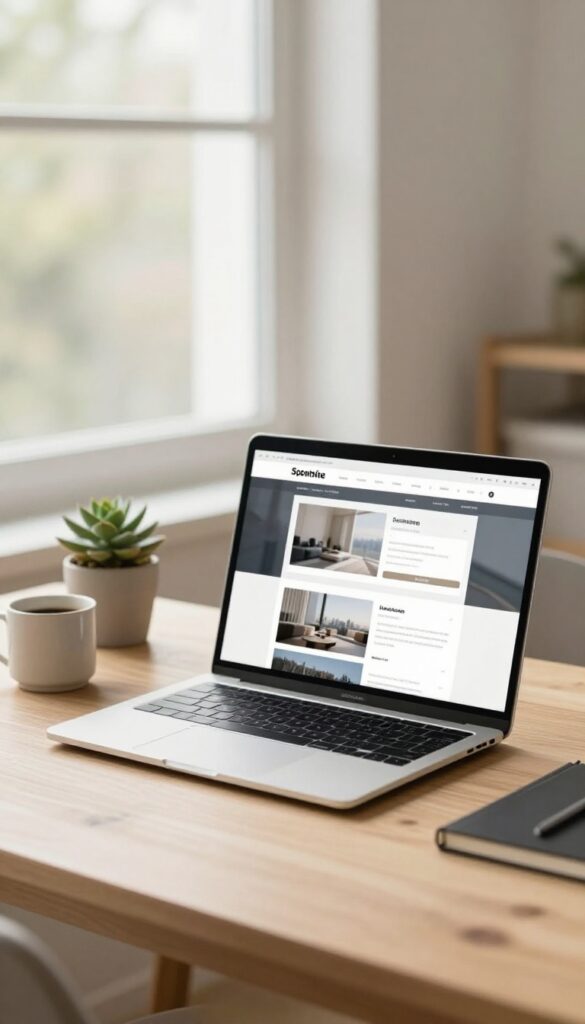
WordPress powers over 40% of all websites, and for good reason. It gives you full control over your content, design, and future growth. Unlike free platforms that lock you in, a self-hosted WordPress site is yours to keep.
You can tweak anything, add features as you learn, and never worry about hitting a paywall. It's the foundation every beginner needs.
Getting started with WordPress takes an afternoon. You'll need a domain name and a hosting plan, which you can set up through providers like Bluehost or SiteGround. Most hosts offer one-click WordPress installation, so you don't need to touch any code.
Once installed, pick a simple theme and start writing. The dashboard might feel busy at first, but you'll only use a few key areas: Posts, Pages, and Appearance. As you grow, you can explore plugins for SEO, security, and backups.
The best part? You own everything—your content, your data, your brand.
Why Self-hosted Beats Free
Free platforms like WordPress. com or Blogger limit your monetization options and design flexibility. With self-hosted WordPress, you can run ads, sell products, and customize every pixel. You also get full ownership of your content, so you can move it anywhere if needed.
Setting Up In Under An Hour
Choose a host that offers WordPress installation. Enter your domain and hosting details, then let the host install WordPress for you. Pick a clean, mobile-friendly theme, and you're ready to publish your first post.
No coding required.
Must-have Plugins For Beginners
Start with an SEO plugin like Yoast or Rank Math to optimize your posts. Add a caching plugin like WP Super Cache to speed up your site. Install a security plugin like Wordfence to keep hackers out.
These three cover the basics without overwhelming you.
2. Grammarly: Catch Typos Before Your Readers Do
Typos slip through even when you read your draft three times. Your brain fills in what you meant, not what you actually typed. Grammarly catches those mistakes as you write, so you can fix them before anyone else sees them.
It works inside your browser, your email, and most writing apps. You don't have to copy and paste anything into a separate tool. Just type like you normally do, and the suggestions show up in real time.
The free version handles grammar, spelling, and punctuation. That's enough for most new bloggers.
What It Fixes Without You Thinking
Grammarly flags misspelled words, missing commas, and awkward phrasing. It also catches things like repeated words and mismatched tenses. You'll still make the final call on every suggestion.
Sometimes a sentence sounds better the way you wrote it. The tool just makes sure you notice the issue first.
Why Beginners Benefit Most
New bloggers often publish fast and edit later. That's fine, but small errors add up and can make your site feel less trustworthy. Grammarly gives you a safety net while your editing skills are still developing.
Over time, you'll start catching the same patterns on your own.
How To Use It Without Slowing Down
Install the browser extension and let it run in the background. Ignore the suggestions while you draft, then review them during your edit pass. Don't accept every change just because it's offered.
Read each one and decide if it fits your voice. The goal is cleaner writing, not robotic writing.
Free PDF Download
Not Sure Which Side Hustle Fits You Best?
Take the free Side Hustle Matchmaker Quiz and get a simple 7-day starter plan to help you choose a beginner-friendly idea based on your time, skills, comfort level, and goals.
You’ll get this free PDF plus access to the full Marketerna Save More & Earn More PDF Kit. No spam. Unsubscribe anytime.
3. Google Docs: Draft, Collaborate, and Stay Organized

You probably already have a Google account, which means you already have one of the most flexible writing tools on the web. Google Docs saves every keystroke to the cloud, so a crashed laptop or a dead phone battery never costs you a draft. It also gives you a clean place to write, comment, and share without installing anything.
For a new blogger, the biggest win is simple: your drafts live in one place and follow you everywhere. Start a doc for each post idea, then keep them in a folder named something like "Blog Drafts. " When an editor or a friend offers to look something over, you send a link instead of an attachment.
Their suggestions show up as comments you can accept or ignore. No more files named final-final-v3.
Set Up A System That Doesn't Fall Apart
Create one folder for drafts and another for published posts. Name each doc with the working title so you can find it fast. Use the outline panel on the left to jump between sections of a long post.
A little structure now saves a lot of scrolling later.
Share Without The Email Ping-pong
Click Share, add your editor's email, and choose Commenter so they can suggest changes without rewriting your voice. You can reply to comments right in the doc and resolve them when you're done. If you want feedback from readers, publish the doc to the web for a quick preview link.
Write On Any Device Without Missing A Beat
The mobile app is good enough for jotting down ideas on the bus or polishing a paragraph on the couch. Everything syncs automatically, so you can start on your laptop and finish on your phone. Offline mode keeps you writing even when the Wi-Fi drops.
4. Canva: Create Blog Graphics Without Design Skills
Not everyone can afford a designer, and most beginners shouldn't try to become one. Canva closes that gap with a free drag-and-drop editor and thousands of templates built for blog posts, pins, and social images. You pick a template, swap in your text, drop in a photo, and export.
That's the whole workflow. The result looks clean and professional even if you've never opened Photoshop. The free plan covers almost everything a new blogger needs.
Start there and only upgrade if you hit a specific limit.
Canva works in your browser, so there's nothing to install. Create a free account and your designs save automatically to the cloud. Every template is sized for a specific platform.
Featured images, Instagram posts, Pinterest pins, and YouTube thumbnails all have their own dimensions ready to go. No guessing, no cropping headaches.
Start With A Template, Not A Blank Canvas
Search for your topic or just browse the blog and Pinterest categories. Pick a layout that already looks close to what you want. Then change the colors, fonts, and photos to match your brand.
You'll finish a featured image in about five minutes instead of an hour.
Keep Your Brand Consistent
Set your brand colors and fonts once, and Canva saves them for every future design. This is the fastest way to make your blog look put together. Use the same two or three colors across every image.
Readers start recognizing your posts in a crowded feed.
Resize One Design For Every Platform
The Magic Resize feature (on the paid plan) turns one image into every size you need. Free users can still duplicate a design and change the dimensions manually. Make your featured image first, then adapt it for Pinterest and social.
One idea, three posts, zero extra design work.
Free PDF Download
Not Sure Which Side Hustle Fits You Best?
Take the free Side Hustle Matchmaker Quiz and get a simple 7-day starter plan to help you choose a beginner-friendly idea based on your time, skills, comfort level, and goals.
You’ll get this free PDF plus access to the full Marketerna Save More & Earn More PDF Kit. No spam. Unsubscribe anytime.
5. Yoast SEO: Make Every Post Search-Friendly

You can write a great post and still get zero traffic if search engines can't figure out what it's about. Yoast SEO fixes that without turning you into a technical wizard. It sits inside your WordPress editor and gives you simple red, orange, and green lights as you write.
That feedback tells you exactly what to fix: your title, your meta description, your keyword usage, and more. You don't need to memorize SEO rules. You just follow the checklist and watch the lights turn green.
For beginners, this is huge. You learn SEO by doing it, post by post, instead of reading a 3, 000-word guide and hoping something sticks.
What The Lights Actually Mean
The green light doesn't mean your post will rank number one. It means you've covered the basics: your keyword appears in the right places, your title is a good length, and your meta description is solid. Red means something important is missing.
Orange means it's close but could be better. Treat the lights as a nudge, not a grade. Fix the easy stuff, then move on.
Titles And Meta Descriptions
Your SEO title is what people see in search results. Yoast shows you a preview so you can see how it looks before you publish. Keep it under 60 characters so it doesn't get cut off.
The meta description is the short blurb under the title. You get about 155 characters. Write it like a mini pitch that makes someone want to click.
Yoast will tell you if it's too short or too long.
Keyword Tips For Real Beginners
Pick one main keyword per post and use it naturally. If your post is about 'beginner blogging tools, ' don't force that phrase into every sentence. Yoast checks that it appears in your title, URL, first paragraph, and a few subheadings.
That's usually enough. You can also add related keywords, but don't stress over them at first. One clear focus beats five half-used ones.
6. Google Analytics: See What's Actually Working
Guessing which posts people actually read gets old fast. Google Analytics replaces those guesses with numbers, showing you who shows up, what they read, and where they came from. It sounds intimidating, but you only need a few reports to learn a lot.
Set it up once, then check in every week or two to see what's gaining traction. That feedback loop is what separates blogs that grow from blogs that stall. You stop writing blind and start doubling down on what already works.
Once the tracking code is live on your site, the data starts rolling in within a day or so. You don't need to understand every metric. A handful of reports tell you almost everything a beginner needs to know.
The goal isn't to obsess over numbers. It's to spot patterns, then use them to decide what to write next.
Find Your Most-read Posts
The Behavior report shows which pages pull the most views. If one post keeps outperforming the rest, that's a signal. Readers want more on that topic, so give them a follow-up or a deeper dive.
You'll also spot posts that get traffic but no engagement. Those might need a better headline, clearer intro, or stronger call to action.
See Where Readers Come From
The Acquisition report breaks down your traffic sources. You'll see how much comes from Google search, social media, referrals, or direct visits. If Pinterest sends most of your readers, lean into it.
If search traffic is climbing, your SEO is working and you should keep writing for those keywords.
Track What Keeps People Reading
Bounce rate and average time on page tell you whether visitors stick around. A high bounce rate on a post usually means the intro didn't hook them or the page loaded slowly. Use those numbers as clues, not verdicts.
A short post can have a high bounce rate and still do its job perfectly.
7. MailerLite: Build an Email List from Day One
Social media followers come and go. An email list sticks around, and it's yours to keep. MailerLite makes it easy to start collecting subscribers before you have much traffic at all.
The free plan covers a surprising amount for beginners. You get signup forms, a landing page, and room for plenty of subscribers without paying a cent. That means you can grow an audience while your blog is still finding its footing.
Most successful bloggers will tell you the same thing: the list matters more than the follower count. MailerLite gives you a simple way to start building one right away.
Set Up Your First Signup Form
Drag a form onto your site or use the built-in landing page builder. Connect it to a welcome email that sends automatically to every new subscriber. That single setup turns casual readers into people who hear from you again.
Send Newsletters Without The Fuss
The drag-and-drop editor keeps things simple, even if you've never sent a newsletter before. Write a short note, drop in a link to your latest post, and hit send. No coding, no complicated templates.
Automate The Follow-up
Set up a short welcome sequence that introduces you and shares your best posts. Once it's running, it works while you sleep. New subscribers get a warm intro without you lifting a finger.
8. Buffer: Schedule Social Posts and Save Time
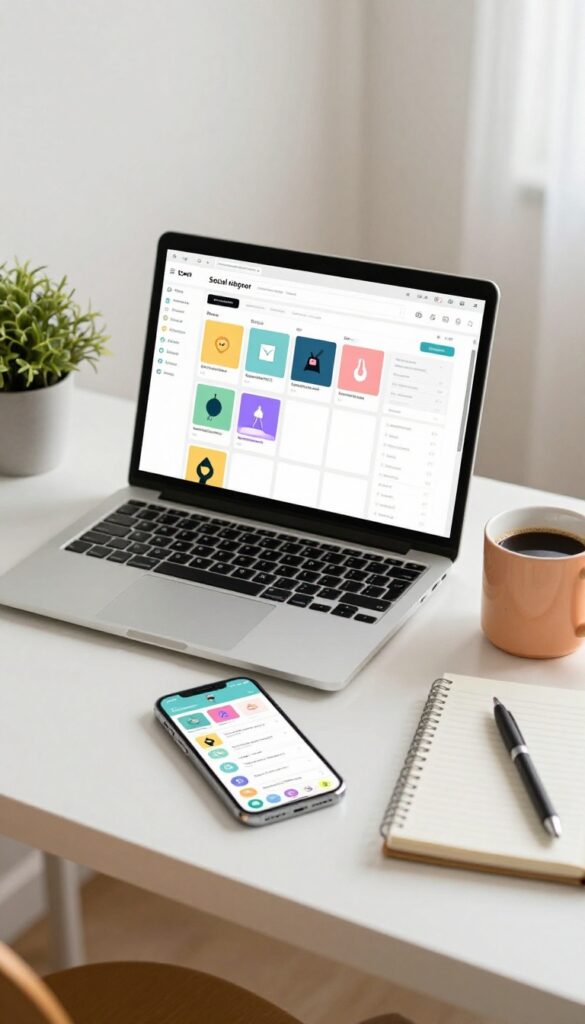
Posting to social media shouldn't feel like a second job. Buffer lets you plan and publish to multiple platforms from one dashboard, then check performance without bouncing between apps. For bloggers, that means more time writing and less time logging in and out.
You don't need to be on every platform at once. Buffer helps you stay consistent on the ones that matter, even when you're deep in a writing sprint. It's a simple way to keep your social presence alive without letting it eat your day.
Queue Up A Week In One Sitting
Spend an hour on Sunday and schedule posts for the next seven days. Buffer's queue holds your content and publishes automatically, so you're not scrambling for something to share each morning.
See What's Working At A Glance
Buffer shows you likes, comments, and clicks for each post without opening Twitter, Facebook, or LinkedIn separately. You'll quickly learn which types of updates your audience actually engages with.
Start Free, Upgrade When You Grow
The free plan covers three social accounts and 10 scheduled posts per channel. That's plenty for a new blog. When you need more, the paid plans are affordable and add analytics and team features.
9. Unsplash: Find Free, High-Quality Photos
A blog post without images feels like a room with no windows. But grabbing random photos from Google Images can land you in copyright trouble. Unsplash solves that problem with a massive library of free, high-quality photos you can use anywhere.
Every image is royalty-free, so you never have to worry about licensing fees or takedown notices. It's a simple way to make your posts look polished without spending a dime.
Unsplash started as a small Tumblr blog and grew into one of the most popular sources for free visuals. Photographers upload their work, and you get to download and use it for commercial and personal projects. No attribution required, though giving credit is always appreciated.
The quality is consistently high, which means your blog can look like it hired a professional photographer. You don't need an account to browse, but signing up lets you create collections and save favorites for later.
How To Find The Right Image
Use the search bar with specific keywords. Instead of 'business, ' try 'laptop coffee shop' or 'team meeting whiteboard. ' The more specific you are, the better the results. You can also filter by orientation (landscape, portrait, square) to match your blog layout.
If you find a photographer you like, click their profile to see more of their work. Save images to a collection so you can easily find them when you're ready to publish.
Using Unsplash Images Responsibly
Even though Unsplash images are free, you can't resell them as-is or claim them as your own. Don't use them to create a competing stock photo site. Also, avoid using photos of identifiable people in a way that suggests endorsement.
For most blog posts, you're safe. Just use common sense and respect the photographer's work. If you want to be extra careful, add a small credit line like 'Photo by [Name] on Unsplash. '
Quick Tips For Better Blog Visuals
Mix wide shots with close-ups to keep readers engaged. Use the same filter or color tone across images for a cohesive look. Compress images before uploading to keep your site fast.
Unsplash offers different sizes, so pick one that fits your layout without slowing down your page. And don't forget to add alt text for accessibility and SEO.
10. Ubersuggest: Find Keywords Beginners Can Rank For

Ubersuggest takes the mystery out of keyword research. It shows you what people type into Google and how hard it is to rank for those terms. You don't need an SEO background to use it.
The tool gives you a list of keywords with search volume and difficulty scores. You can filter for low-competition terms that are realistic for a new blog. It also suggests content ideas based on what's already working.
Start with a broad topic related to your blog. Ubersuggest will show you related keywords and questions people ask. Pick a few that feel like a good fit and write posts around them.
How To Find Low-competition Keywords
Type your main topic into the search bar. Look for keywords with a difficulty score under 30. These are terms where new sites can actually show up in search results.
Check the monthly search volume too. You want a balance between decent traffic and low competition. Even 100 searches a month is a win if you can rank on page one.
Use The Content Ideas Report
Ubersuggest shows you popular posts from other sites based on your keyword. This gives you a clear picture of what format works. You can see headlines, word counts, and social shares.
Don't copy those posts. Use them as a starting point. Add your own angle, examples, or personal experience to make your post stand out.
Track Your Rankings Over Time
Once you publish, add your keyword to the rank tracker. It shows where you appear in Google for that term. Check back every few weeks to see progress.
If you're stuck on page three or four, tweak your title or add more detail. Small changes often move the needle. Celebrate every jump to page one.
11. Notion: Plan Content and Keep Ideas in One Place
Blog post ideas tend to show up at the worst times—in the shower, on a walk, or right before you fall asleep. If you don't capture them somewhere, they vanish. Notion gives you one flexible space to store every idea, plan your editorial calendar, and keep research notes attached to the right post.
It's part note-taking app, part project manager, and part filing cabinet. You don't need a complicated setup to start. A simple page with a few sections is enough to keep your blog from feeling scattered.
Most beginners juggle three or four apps just to manage content. Notion replaces that mess with a single workspace you can shape however you want. You can start with a basic table for your content calendar and add more structure later as your blog grows.
The real win is having everything in one place—no more digging through old notes or forgetting where you saved that link.
Capture Ideas Before They Disappear
Create a quick-capture page where you dump every headline, angle, or half-formed thought. Don't worry about organizing it yet. Just get it out of your head and into Notion.
You can sort it later when you're ready to plan.
Build A Simple Content Calendar
Use a Notion database to track each post from idea to published. Add columns for status, publish date, and keywords. This gives you a clear view of what's coming up without opening a separate calendar app.
Keep Research Attached To The Right Post
Link notes, quotes, and source links directly to the post they belong to. When you sit down to write, everything you need is already there. No more searching through browser bookmarks or random docs.
12. ConvertKit: Turn Readers into Paying Subscribers
ConvertKit is an email marketing platform built for creators. It helps you collect email addresses, send newsletters, and automate follow-ups without needing a tech degree. If you want to turn casual readers into loyal fans who pay for your work, this tool makes it simple.
Unlike social media, your email list is yours. ConvertKit gives you the tools to grow that list and actually make money from it. You can create landing pages, set up automated welcome sequences, and even sell digital products or subscriptions.
It's a beginner-friendly way to build a direct line to your audience.
Build A Landing Page In Minutes
ConvertKit comes with drag-and-drop landing page templates. You can create a simple signup page for your freebie or newsletter in under 10 minutes. No coding or design skills needed.
Just pick a template, add your copy, and connect it to your email list.
Automate Your Welcome Emails
When someone joins your list, you want to greet them right away. ConvertKit's visual automation builder lets you set up a sequence of emails that send automatically. You can introduce yourself, share your best posts, and pitch a product—all without lifting a finger after setup.
Sell Products And Subscriptions
You don't need a separate store to make money. ConvertKit lets you sell ebooks, courses, or paid newsletters directly. Connect a payment processor, and you can start charging for your best content.
It's a straightforward way to turn your blog into income.
FAQ
Do I need all 12 tools to start a blog?
No. Start with WordPress, Grammarly, and Canva. Add others as your blog grows and you hit specific needs.
Are these blogging tools free?
Most have solid free plans. WordPress is free but needs hosting. Others like Grammarly and Canva offer free versions with optional upgrades.
Which tool should I learn first?
Get comfortable with WordPress first. It's your publishing hub. Then add Grammarly and Canva to improve quality and visuals.
How long before I see results from these tools?
Some help immediately, like Grammarly and Canva. SEO and analytics take a few months to show meaningful data. Be patient and consistent.
Can I use these tools on a phone?
Yes, most have mobile apps or mobile-friendly websites. WordPress, Canva, and Buffer work well on phones for blogging on the go.
Conclusion
You don't need a fancy setup to start blogging. You need a few reliable tools that remove friction and let you focus on writing. Pick one or two from this list and get comfortable with them first.
As your blog grows, add more tools to solve specific problems.
The goal isn't to collect software. It's to publish consistently and connect with readers. Start simple, stay consistent, and let the tools support your progress.
Free PDF Download
Not Sure Which Side Hustle Fits You Best?
Take the free Side Hustle Matchmaker Quiz and get a simple 7-day starter plan to help you choose a beginner-friendly idea based on your time, skills, comfort level, and goals.
You’ll get this free PDF plus access to the full Marketerna Save More & Earn More PDF Kit. No spam. Unsubscribe anytime.