15 Ways to Get Pinterest Traffic to Your Blog
Pinterest isn't just a place to save recipes and outfit ideas. It's a visual search engine that can send a steady stream of readers to your blog every single day. The best part?
You don't need a huge following or a big budget to make it work. Most bloggers treat Pinterest like social media and wonder why nothing clicks. The ones who get traffic treat it like a search engine, and that changes everything.
Small tweaks to your pins, boards, and profile can turn a quiet blog into a busy one. Below are 15 ways to get Pinterest traffic to your blog. Pick a few, test them, and watch what happens.

Free PDF Download
Not Sure Which Side Hustle Fits You Best?
Take the free Side Hustle Matchmaker Quiz and get a simple 7-day starter plan to help you choose a beginner-friendly idea based on your time, skills, comfort level, and goals.
You’ll get this free PDF plus access to the full Marketerna Save More & Earn More PDF Kit. No spam. Unsubscribe anytime.
1. Claim Your Website So Pinterest Knows It's Yours

Before you pin anything else, tell Pinterest who you are. Claiming your website links your domain to your Pinterest account, and it's the difference between pinning as a random user and pinning as the actual source. It takes about five minutes, but the payoff lasts as long as your blog does.
Once your site is claimed, Pinterest starts treating your content differently.
Head to your Pinterest settings and look for the "Claim" section. You'll get a few verification options, and most bloggers use the HTML tag method because it works with any platform. Copy the meta tag Pinterest gives you, drop it into your site's header, then come back and hit verify.
If you're on WordPress, an SEO plugin like Yoast or Rank Math can handle this without touching code. Once it's confirmed, you'll see a small checkmark next to your profile. That checkmark tells visitors your pins come from a real, verified source.
What Claiming Actually Unlocks
Claimed accounts get access to Pinterest analytics, which shows you impressions, saves, and clicks for every pin. Without it, you're guessing. You also become eligible for rich pins, which pull extra details like your headline and author info straight from your blog.
Those pins tend to stand out in the feed and earn more clicks.
Do This Before You Pin Another Image
Claim your site first, then start publishing. Pins you uploaded before claiming won't automatically get the benefits, so it's worth re-pinning your best posts once you're verified. Double-check that your profile links back to your blog and that your bio mentions what you write about.
Pinterest uses those signals to figure out who should see your content.
A Quick Fix If Verification Fails
Sometimes the tag doesn't take on the first try, usually because it landed in the wrong spot in your header. Clear your cache, confirm the tag is live in your page source, and try again. If you use a host like Squarespace or Shopify, there's often a built-in field for verification codes.
Skip the code entirely and paste it there instead.
2. Switch to a Business Account for Better Insights
A free Pinterest business account gives you tools that a personal account simply doesn't have. You'll see which pins drive clicks, which boards perform best, and how people find you. It also makes your profile look more professional, which Pinterest tends to favor in search results.
Switching takes about two minutes and costs nothing. You keep all your existing pins and boards, so you won't lose any progress. Once you're in, the analytics alone are worth it.
What You Unlock
You get access to Pinterest Analytics, which shows impressions, saves, and clicks for every pin. You can also claim your blog website, so Pinterest credits your content to you. And if you ever want to run ads, you'll need a business account for that too.
How To Make The Switch
Go to your settings and look for the 'Switch to business account' option. Follow the prompts, add your blog URL, and claim your website. It's free and takes just a couple of minutes.
Using Your New Data
Check your analytics weekly to see what's working. Double down on the pin formats and topics that get the most clicks. If a board isn't sending traffic, tweak it or let it go.
Free PDF Download
Not Sure Which Side Hustle Fits You Best?
Take the free Side Hustle Matchmaker Quiz and get a simple 7-day starter plan to help you choose a beginner-friendly idea based on your time, skills, comfort level, and goals.
You’ll get this free PDF plus access to the full Marketerna Save More & Earn More PDF Kit. No spam. Unsubscribe anytime.
3. Design Vertical Pins That Stop the Scroll

Pinterest is a visual platform, and the way your pin looks can make or break its performance. Vertical pins take up more space in the feed, which means they're harder to ignore. But just being vertical isn't enough.
You need to design pins that catch the eye and make people want to click. The ideal pin size is a 2: 3 ratio, like 1000×1500 pixels. That tall format gives you more room for bold text and clear imagery.
When done right, your pin stands out even in a crowded feed.
A great pin combines a few key elements: a strong image, readable text, and a clear call to action. The goal is to make someone stop scrolling and think, 'I need to read that. ' Here's how to design pins that do exactly that.
Use The Right Dimensions
Stick to a 2: 3 ratio—1000×1500 pixels is a safe bet. This size looks good on both mobile and desktop. Avoid square or horizontal images; they get lost in the feed.
Make Text Bold And Readable
Use large, easy-to-read fonts. A bold headline that states the benefit works best. Keep text minimal—just enough to intrigue.
Overcrowded text gets ignored.
Choose Clear, High-quality Images
Use bright, high-contrast photos that relate to your topic. Avoid busy backgrounds that compete with your text. A simple, striking image with a pop of color can stop the scroll.
4. Write Keyword-Rich Pin Titles and Descriptions
Pinterest works like a search engine, so the words you use in your pin titles and descriptions matter more than you might think. When someone types a phrase into that search bar, Pinterest scans pin text to decide what to show. If your pins don't include the phrases people actually type, they won't show up.
The fix is simple: treat every pin title and description like a mini search listing. Put the most important keywords near the front, and write naturally so it still reads like a human wrote it. You don't need to stuff keywords everywhere.
Just make sure the main phrase you want to rank for appears in the title, the description, and the alt text. That's how you get found.
Find Phrases People Actually Search
Open Pinterest and type your topic into the search bar. The suggestions that pop up are real searches people are making right now. Write those down and use them as your pin titles.
You can also check the colored bubbles that appear after you search. They show related terms and variations. Pick the ones that fit your post best.
Place Keywords Where They Count
Put your main keyword in the first few words of your pin title. Pinterest weighs early words more heavily, so don't bury the important phrase at the end. In the description, use the keyword once or twice naturally.
Then add a sentence or two that gives context and invites people to click. Think of it as a short pitch, not a keyword dump.
Write For Humans, Not Robots
A title like "Easy Vegan Dinner Recipes for Busy Weeknights" works because it sounds like something a person would say. A title like "Vegan Recipes | Easy Vegan | Vegan Dinner" looks spammy and turns people off. Read your title out loud.
If it sounds awkward, rewrite it. The goal is to be clear and helpful, not to trick the algorithm.
Free PDF Download
Not Sure Which Side Hustle Fits You Best?
Take the free Side Hustle Matchmaker Quiz and get a simple 7-day starter plan to help you choose a beginner-friendly idea based on your time, skills, comfort level, and goals.
You’ll get this free PDF plus access to the full Marketerna Save More & Earn More PDF Kit. No spam. Unsubscribe anytime.
5. Create Multiple Pins for Every Blog Post
One pin per blog post is a missed opportunity. Pinterest rewards fresh content, and that doesn't mean you need to write new articles. It means you can design several pins for the same URL and share them over time.
Each pin gives your post another chance to get discovered by a different audience.
Think of each pin as a separate doorway to your blog post. Some people click on a bright graphic with bold text, while others prefer a subtle photo with a simple overlay. By creating multiple pins, you cover more visual preferences and search queries without spamming the same image.
Why Fresh Pins Work
Pinterest's algorithm favors new pins, even if they link to an older post. When you upload a fresh pin, Pinterest shows it to a small test group. If it performs well, it gets pushed to more people.
This cycle repeats with each new pin, keeping your content in rotation.
How Many Pins Is Enough?
Start with three to five pins per blog post. You can create them all at once or space them out over a few weeks. The key is to vary the design, headline, and description.
Don't just change the background color and call it new.
Keep It From Looking Spammy
Space out your pins and avoid uploading identical images back-to-back. Use different boards and descriptions that target related keywords. Pinterest wants variety, not repetition.
If you flood the same pin, it might get flagged as spam.
6. Use Idea Pins to Reach New Audiences

Idea Pins work differently from standard pins, and that difference is exactly why they're worth your time. They show up in places regular pins don't, which means fresh eyes on your content from people who've never heard of your blog. Those extra views don't always send clicks right away.
What they do is bring new people to your profile, and that's where the blog traffic starts to build. Someone watches your Idea Pin, taps your profile, and finds your other pins pointing straight to your posts.
The trick is treating Idea Pins as a top-of-funnel move rather than a direct traffic source. You're not chasing a click on the pin itself. You're getting noticed, then letting your profile do the selling.
Here's how to make that work without overcomplicating it.
Keep Them Short And Watchable
Aim for a handful of quick frames that each deliver one small tip, step, or visual moment. People swipe fast, so every frame needs to hold attention on its own. Skip the long windup.
Start with the most interesting part and let the rest unfold from there.
Add A Clear Next Step
End your Idea Pin with a nudge toward your profile, not a hard sell. Something simple like "more tips on my page" gives viewers a reason to tap through without feeling pushed. Once they land on your profile, your regular pins and board covers should make it obvious where your blog lives.
Match Your Profile To The Promise
If your Idea Pin is about quick dinner recipes, your profile shouldn't be a random mix of everything. Keep your recent pins and boards aligned with what brought people there. That consistency is what turns a curious viewer into an actual blog reader.
7. Join Group Boards in Your Niche
Group boards let you piggyback on someone else’s audience. When you pin to a board with thousands of followers, your content shows up in their feed. That’s free exposure you can’t get from your own boards alone.
But not all group boards are worth your time. Some are abandoned, some are spammy, and some have nothing to do with your blog. The trick is finding active, relevant ones where your pins actually get seen.
Before you join, do a quick check. Look at the board’s last few pins. Are they recent?
Do they get saves and clicks? If the board looks dead, skip it. Also, make sure the board fits your niche.
A food blogger pinning to a fashion group board won’t get far. Relevance matters more than size.
How To Find Good Group Boards
Start with bloggers you already follow. Check their profiles for group boards they contribute to. You can also search Pinterest for your main keyword plus “group board” to see what pops up.
Another option: join Facebook groups for bloggers in your niche. Many share lists of active group boards with instructions on how to join.
What To Look For Before You Join
Check the board’s rules. Some require you to follow all contributors or pin a certain number of times per week. If the rules feel like a chore, move on.
Look at the number of contributors. A board with 50 people pinning daily is usually more active than one with 500 who never pin. Activity beats size every time.
How To Be A Good Group Board Member
Don’t just dump your pins and leave. Save other people’s content too. That keeps the board healthy and encourages others to share your stuff.
Stick to the board’s topic. If it’s a DIY home decor board, don’t pin your travel posts. Respect the theme, and you’ll get more engagement.
8. Schedule Pins with Tailwind or Pinterest's Native Scheduler

Pinterest rewards consistency, not random bursts of activity. If you only pin when you remember, your reach will be spotty. Scheduling tools keep your pins going out even when you're busy with life or other work.
You don't need to be glued to your phone to stay visible.
Tailwind and Pinterest's own scheduler both let you queue up pins in advance. You can batch a week's worth of content in one sitting and let the tool handle the rest. This means your blog stays in front of people without daily effort.
It's a simple shift that makes a big difference over time.
Why Timing Matters
Pinterest users are active at different times depending on where they live. Scheduling lets you hit those peak windows without waking up at 3 a. m. You can also spread pins out instead of dumping them all at once.
That steady drip keeps your content circulating longer.
Tailwind Vs. Native Scheduler
Tailwind offers smart scheduling, interval pinning, and analytics that show what's working. Pinterest's native scheduler is free and simple, but it lacks advanced features. If you're just starting, the native tool is fine.
As you grow, Tailwind's extras can save you time and boost results.
Batch Your Pins
Set aside one hour a week to create and schedule pins for your latest posts. Use a template to speed up design, then load them into your scheduler. This habit keeps your queue full and your traffic steady.
You'll never scramble to pin again.
9. Optimize Your Profile Bio and Board Descriptions
Your Pinterest profile and board descriptions are searchable real estate. Most bloggers leave them blank or fill them with vague phrases like "lifestyle blogger" that tell Pinterest nothing. When you add the right keywords, you help Pinterest understand what you pin and who you help, which means your content shows up in more searches.
Think of your bio as a mini elevator pitch for the Pinterest algorithm. It needs to say what you do, who you serve, and what someone will find on your boards. The same goes for each board description—they're not just labels, they're searchable text that can bring people to your pins.
Write A Keyword-rich Bio
Your bio has limited space, so make every word count. Include your main topic and the audience you write for, like "Helping busy moms plan easy weeknight meals" or "Travel tips for budget backpackers. " Avoid generic words like "enthusiast" or "lover"—they don't help anyone find you.
Craft Board Descriptions That Search
Each board description should explain what the board is about and include relevant keywords. For example, instead of "Dinner Ideas, " write "Quick and easy dinner recipes for families, including 30-minute meals and one-pan dishes. " This gives Pinterest more context and helps your board appear in related searches.
Keep It Consistent
Use the same keywords across your bio and boards to reinforce your niche. If you blog about gardening, your bio and board descriptions should all mention gardening, plants, or growing vegetables. Consistency signals to Pinterest that you're an authority on that topic, which can boost your overall visibility.
10. Add a Pinterest Save Button to Your Blog

Your blog readers are already interested in what you have to say. Why not make it effortless for them to share your content on Pinterest? A simple save button turns casual visitors into promoters, pushing your pins in front of new eyes without any extra work from you.
It's a small addition with a big payoff.
When someone lands on your blog post and loves what they see, they might want to save it for later. If there's no easy way to do that, they'll likely move on and forget about it. A Pinterest save button removes that friction.
It lets readers pin your images directly to their boards with one click, which means your content gets seen by their followers and potentially goes viral. The best part? You set it up once and it works around the clock.
How To Add A Save Button
Most blogging platforms have plugins or built-in options for adding Pinterest save buttons. For WordPress, you can use a plugin like 'Pinterest Pin It Button for Images' or 'Social Warfare. ' If you're on Squarespace or Wix, they often have native Pinterest integration. Just search your platform's help docs for 'Pinterest save button' and follow the steps.
It usually takes less than 10 minutes.
Where To Place It
Put the save button where it's most visible. The top of your post, near the title, is a prime spot. You can also add it to your images so it appears when someone hovers over them.
And don't forget about your sidebar or at the end of your post. The more places readers see it, the more likely they are to use it.
Make Your Images Pin-friendly
A save button only works if your images are worth pinning. Use vertical images (like 600×900 pixels) with clear, readable text overlay. Bright, high-contrast colors tend to perform better.
And always include your blog URL on the image so people can find you even if they see it on Pinterest without clicking through.
11. Pin Consistently Without Burning Out
Pinning every day sounds great until you've spent three hours designing pins and you still haven't written a word for your blog. That's the fast track to quitting. The fix isn't more willpower.
It's a routine small enough that you barely notice it, but steady enough that Pinterest keeps showing your pins to new people. Think of it like brushing your teeth. A few minutes, most days, and you're done.
Consistency on Pinterest doesn't mean posting ten pins a day forever. It means showing up often enough that the algorithm keeps you in rotation. A simple weekly rhythm beats a heroic weekend sprint every time.
Build A Batching Day
Pick one day a week to design pins in bulk. Open Canva, make five to ten pins for posts you've already published, and save them in a folder. Now you have a week's worth of content ready to go.
No scrambling, no last-minute design sessions.
Use A Scheduler
Pinterest's own scheduler lets you queue pins for free, and tools like Tailwind can spread them out even further. Load your batch, set the times, and walk away. You're still pinning daily.
You're just not doing it daily.
Set A Timer, Not A Goal
Give yourself 15 minutes a day for Pinterest tasks like saving other people's pins, checking comments, or refreshing a board description. When the timer goes off, stop. A small daily habit you can keep beats a big one you dread.
Take Real Breaks
You can skip a few days without losing momentum. Pinterest traffic dips slowly, not overnight. If you're traveling or sick, let it slide.
Come back, queue a batch, and you're right back in the flow.
12. Analyze What's Working and Double Down
You might be creating pins that look great but get zero clicks. That's why you need to check your Pinterest analytics regularly. Look at which pins drive the most traffic to your blog, then make more of those.
It's the simplest way to grow without guessing.
Pinterest gives you data on impressions, saves, and clicks. Focus on clicks because that's what actually sends readers to your blog. Once you know your top performers, you can create similar pins and topics.
Find Your Top Pins
Go to Pinterest Analytics and sort by outbound clicks. See which pins are driving the most traffic. Pay attention to the design, headline, and topic.
Those are your winners.
Spot Patterns
Look for common threads in your top pins. Maybe they all use a certain color scheme or a specific keyword. Or they might all be list posts or how-to guides.
Once you spot a pattern, you can replicate it.
Create More Of What Works
Take your best-performing pin and make five variations. Change the image, tweak the headline, or test a different format. Then pin them to relevant boards.
Keep tracking to see which new ones take off.
13. Repin Your Best Content at Smart Intervals
You've probably got a handful of pins that consistently drive traffic. Instead of letting them gather dust, you can repin them every few months to reach new people. It's like giving your best content a second (or third) life on Pinterest.
The key is to do it at smart intervals, not spam your followers.
Pinterest's algorithm loves fresh pins, but it also rewards pins that perform well over time. When you repin a top performer, you're not just repeating yourself—you're putting it in front of a new audience that might have missed it the first time. Plus, it gives the algorithm another signal that this pin is valuable.
Just don't overdo it. Space out your repins and mix them with new content.
How Often Should You Repin?
A good rule of thumb is every 3 to 6 months. That gives enough time for the pin to cycle through the algorithm and for new users to discover it. If you repin too soon, it might look spammy.
If you wait too long, you miss out on potential traffic. Set a reminder in your calendar so you don't forget.
Which Pins Are Worth Repinning?
Check your Pinterest analytics. Look for pins with high saves, clicks, and impressions. Those are your winners.
Also, consider seasonal content—repin it a few weeks before the season starts. And don't just repin the same image; create a fresh pin with a new design to avoid looking repetitive.
Repin To Different Boards
Don't just repin to the same board. Share it to other relevant boards you own or group boards you're part of. This exposes your pin to different audiences.
Just make sure the board is a good fit for the content. If you're not sure, create a new board specifically for your best evergreen content.
14. Collaborate with Other Bloggers on Shared Boards
Pinterest is a social platform, but it's also a search engine. When you team up with other bloggers in your niche, you tap into their audience and they tap into yours. Shared boards are an easy way to start.
You pool your pins, reach more people, and build real relationships that can pay off beyond Pinterest.
Shared boards let you pin to a board that multiple contributors manage. Each contributor brings their own followers and pinning habits. That means your pins get seen by people who already trust the other bloggers on the board.
It's like a mini-network that works while you sleep.
Find The Right Partners
Look for bloggers in your niche who are at a similar stage. They don't need to be huge, just active and consistent. Check their boards to see if they pin regularly and if their style matches yours.
A quick DM or email explaining why you'd be a good fit is usually enough. Be clear about what you bring to the table, like fresh pin designs or a engaged audience.
Set Clear Board Guidelines
Before you invite anyone, decide on the board's topic and rules. Will it be strictly one niche or a mix? How many pins per day per person?
What's the quality bar? Write these down in the board description so everyone knows what to expect. Clear guidelines prevent spam and keep the board useful for everyone's followers.
Make It A Win-win
Don't just join boards to drop your links. Engage with other people's pins by saving and commenting. Share the board with your own audience when it makes sense.
When you help others get seen, they're more likely to return the favor. That's how you turn a shared board into a steady source of traffic and a real community.
15. Turn One Blog Post into a Mini Pinterest Campaign
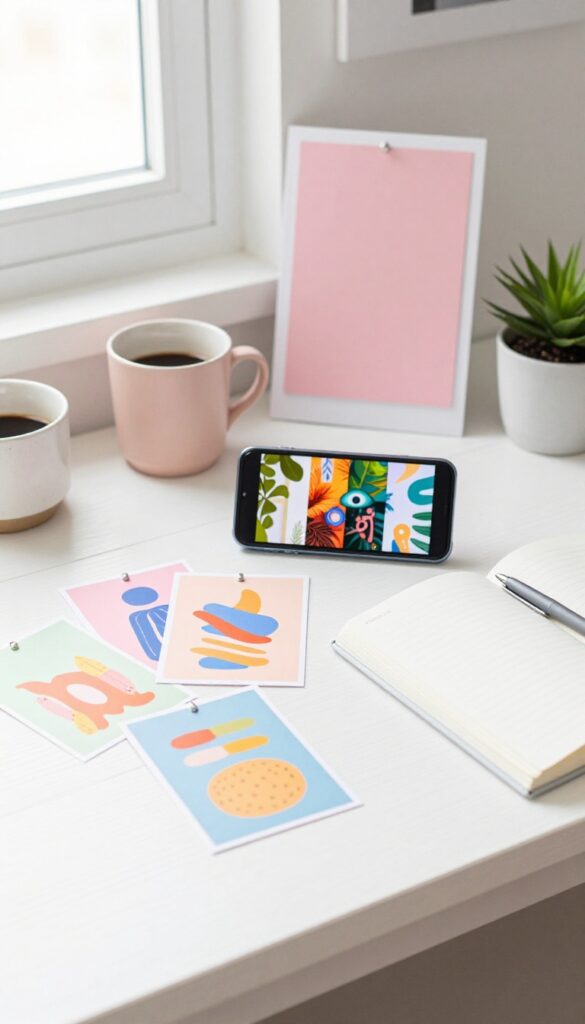
Most bloggers pin a post once and move on. That single pin gets a few impressions, then disappears into the feed. Instead, treat your best post like a small campaign.
Build a handful of pins, one video pin, and a dedicated board around it. This gives Pinterest more ways to match your content with searches, and it keeps your post working for weeks instead of hours.
A mini campaign doesn't mean more work for the sake of it. It means giving one strong post several entry points. Each pin can target a slightly different angle or keyword.
Over time, you'll see which one sticks and double down on it.
Design A Small Set Of Pins
Make three to five pins for the same post. Change the headline, the image, and the color scheme so they don't look identical. One pin might focus on a quick tip, another on a common mistake, and another on the end result.
This variety helps you test what your audience actually clicks.
Add One Video Pin
Video pins get extra visibility on Pinterest right now. You don't need fancy editing. A simple slideshow of images or a short screen recording works fine.
Keep it under 15 seconds and make the first frame clear. Link it to the same blog post so all that attention lands in one place.
Create A Dedicated Board
Build a board around the topic of your post, not just your blog. Give it a clear, searchable name and a keyword-rich description. Pin your new pins there first, then add related content from other creators.
This tells Pinterest what your board is about and gives your post a natural home.
Track And Repeat What Works
After a couple of weeks, check which pin drove the most saves and clicks. That's your winner. Make a few variations of it for other posts, or update the original with a fresh image.
You don't need a new strategy every time. You just need to notice what's already working.
FAQ
How long does it take to see traffic from Pinterest?
Most bloggers see meaningful traffic within 3 to 6 months of consistent pinning. Pinterest rewards fresh, regular activity, so don't expect overnight results.
Do I need a business account to get traffic?
You can get some traffic with a personal account, but a free business account gives you analytics, rich pins, and ads access, which makes growth much easier.
How many pins should I post per day?
Quality matters more than quantity. Start with 3 to 5 fresh pins per day, then adjust based on what your analytics show.
Can I use Pinterest without a blog?
Yes, but if your goal is blog traffic, you need a blog to send people to. Pinterest works best as a funnel to your own site.
What's the biggest mistake new bloggers make on Pinterest?
Treating it like social media instead of a search engine. Focus on keywords, fresh pins, and consistency rather than likes and followers.
Conclusion
Pinterest rewards consistency more than perfection. Start with three strategies that fit your routine, like fresh pin designs, keyword-rich descriptions, and joining a couple of group boards. Give each one a few weeks before judging results.
Then watch what actually drives clicks. Double down on the pin formats and topics your audience saves most. Small, steady tweaks beat a total overhaul every time.
Free PDF Download
Not Sure Which Side Hustle Fits You Best?
Take the free Side Hustle Matchmaker Quiz and get a simple 7-day starter plan to help you choose a beginner-friendly idea based on your time, skills, comfort level, and goals.
You’ll get this free PDF plus access to the full Marketerna Save More & Earn More PDF Kit. No spam. Unsubscribe anytime.